How to enable Microsoft Search in Office 365
2018 marked the launch of Microsoft Search. Microsoft Search is now available in Outlook, OneNote, Teams, SharePoint, and the full Office apps.
If you want to enable it and start customizing it for your organization, you can do so. IT administrators can enable it today. In this short article, I’ll show you how.
What to expect from Microsoft Search today
Today, you can access
Microsoft Search through Bing for Business. This allows you to search virtually all of your Office 365 data. This is done in a much richer way than Delve allows. Not only can you search your email, people, and files, but you can also search Microsoft Teams chats and Yammer conversations. As a starting point for search, this is a big improvement.

Today, you’ll also be able to enjoy similar experiences in Office.com and SharePoint apps.
Enable Microsoft Search
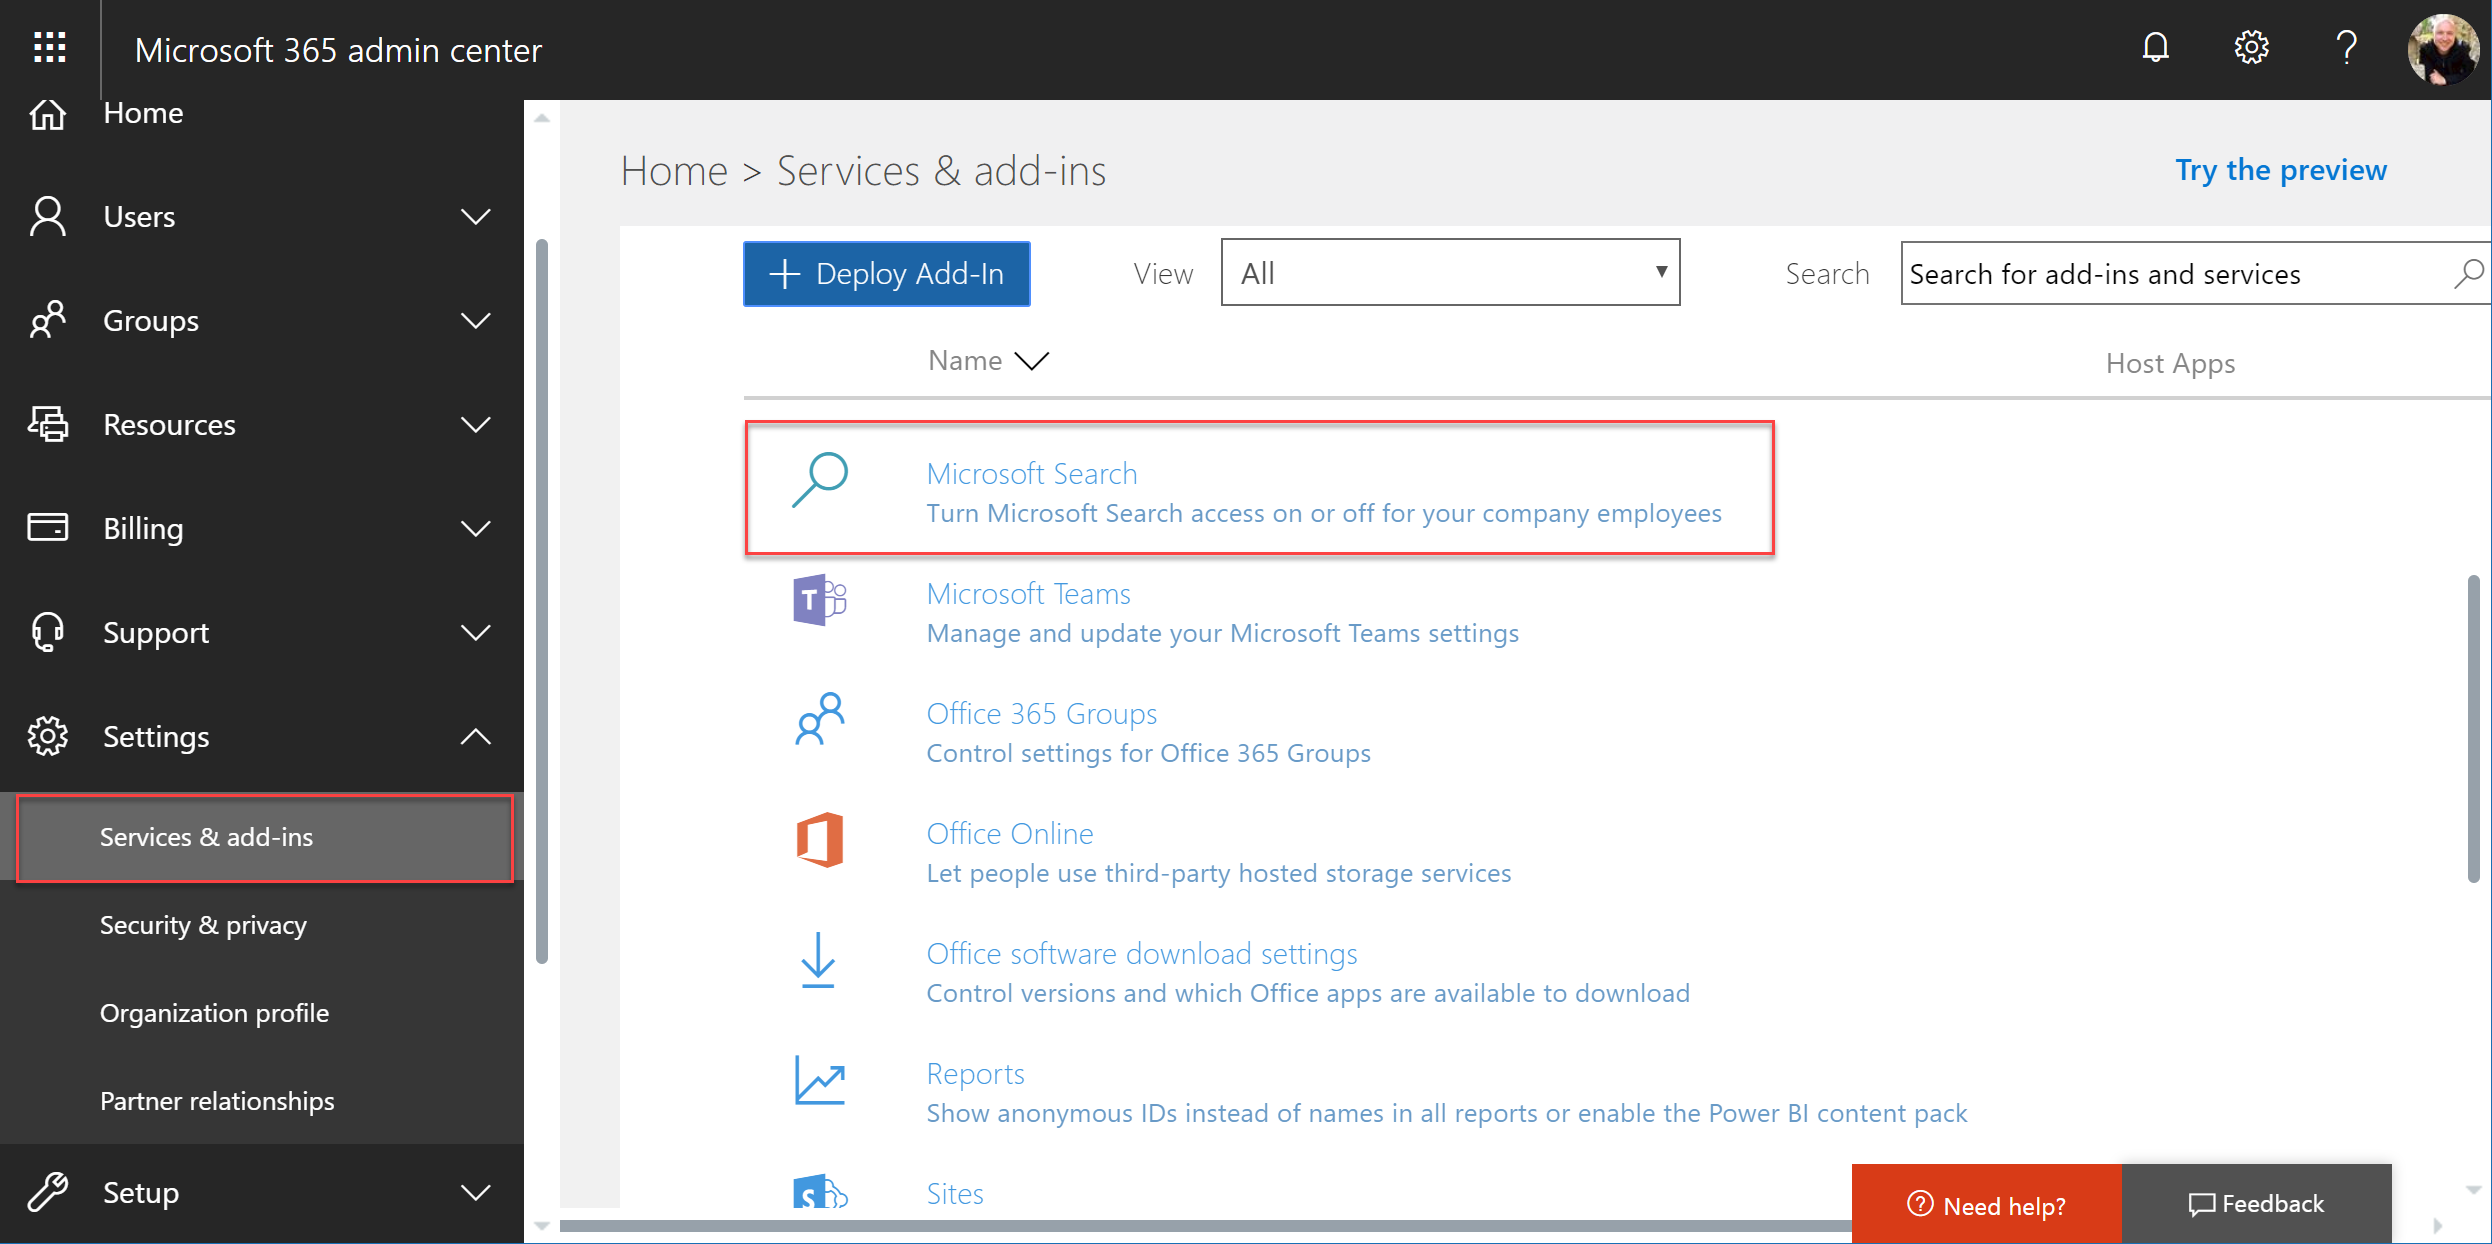
If you want to enable Microsoft Search, go to the Microsoft 365 admin center, then go to Settings > Services and add-ins. Locate Microsoft Search. After selecting Microsoft Search, you’ll enable it and then complete the first-time setup.
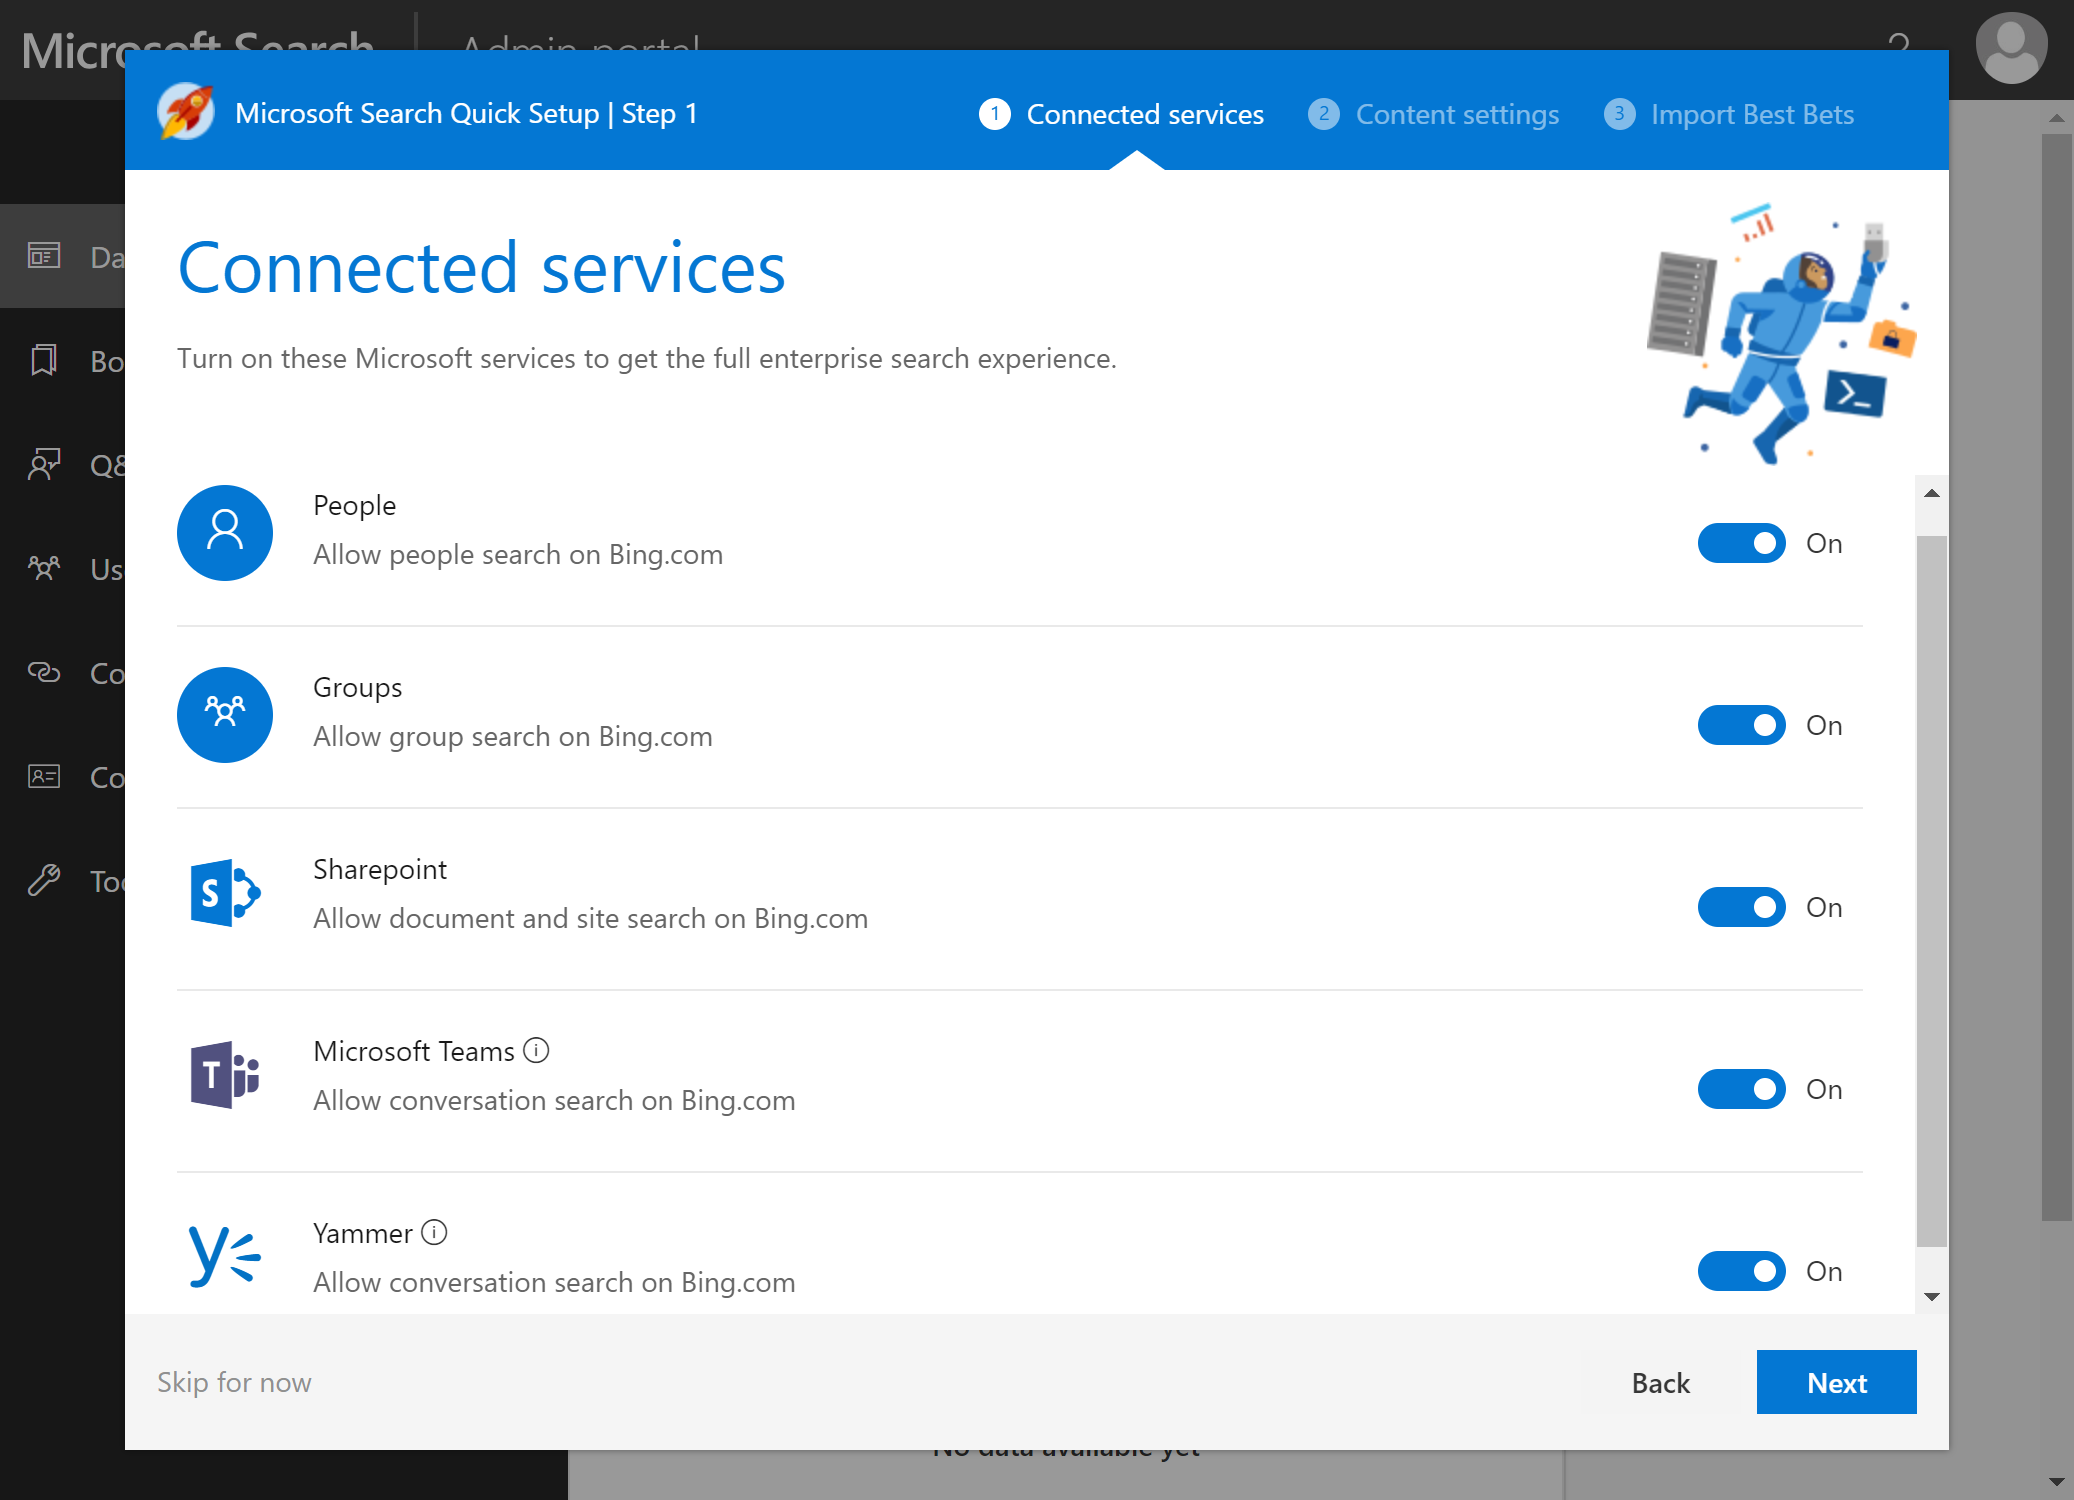
When you first launch Bing for Business, you’ll arrive at the Bing for Business admin center. This is where you manage Microsoft Search and select which services you’ll connect:
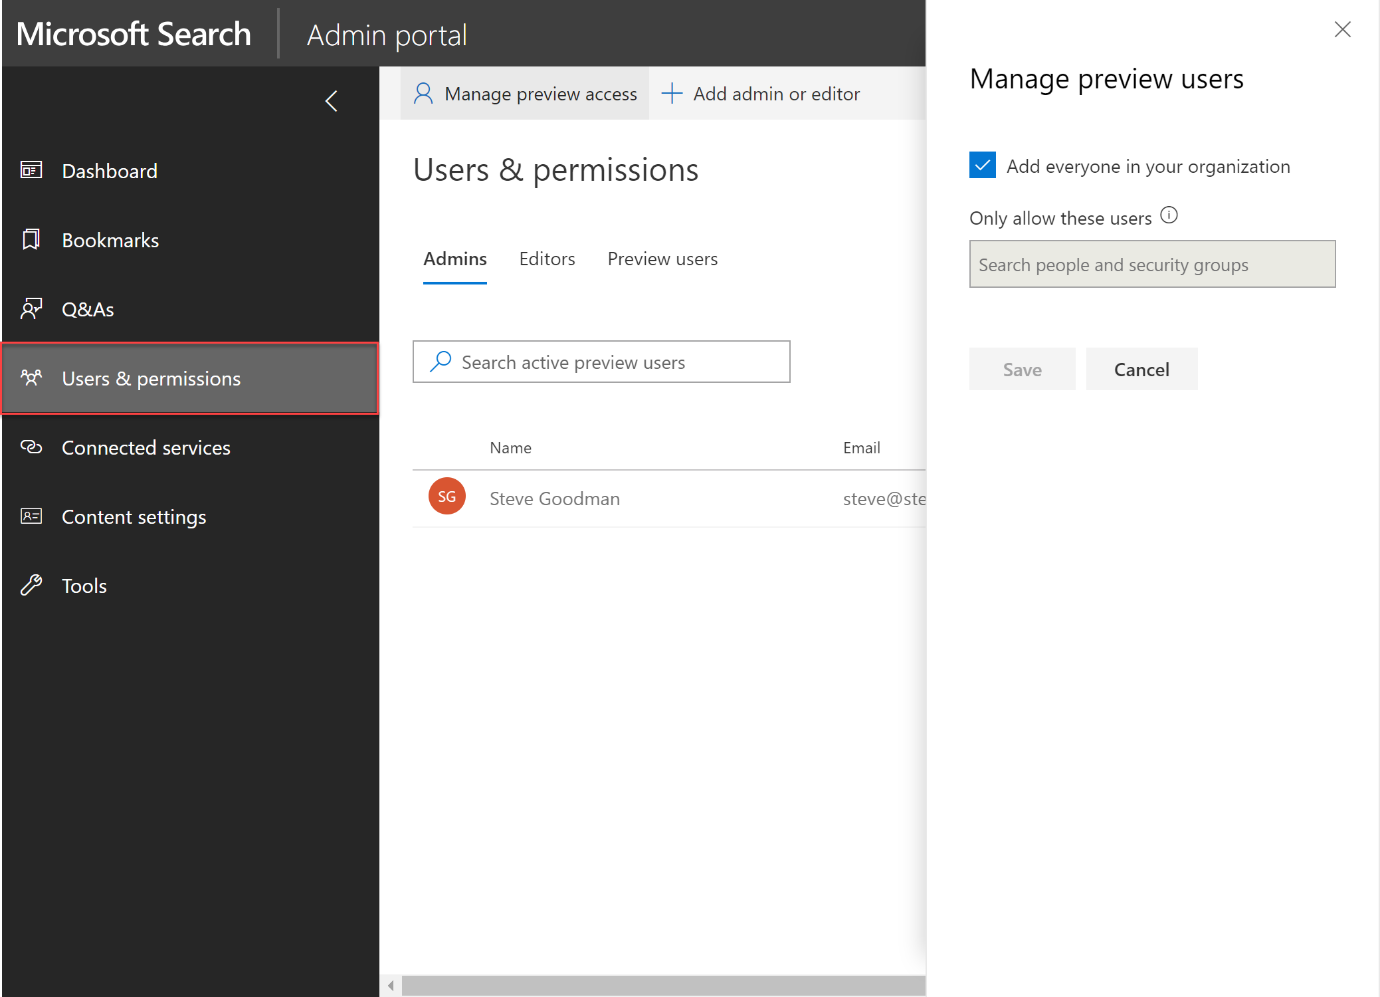
If you’re testing this feature within your organization and want to restrict access, you can limit access. To do this, select Users and permissions. You can then choose to restrict access to Microsoft Search to specific Azure AD users or groups:
Helping users find content
After testing Bing for Business search, you may want to provide your users with help finding relevant content. You can add questions and answers, as well as bookmarks.
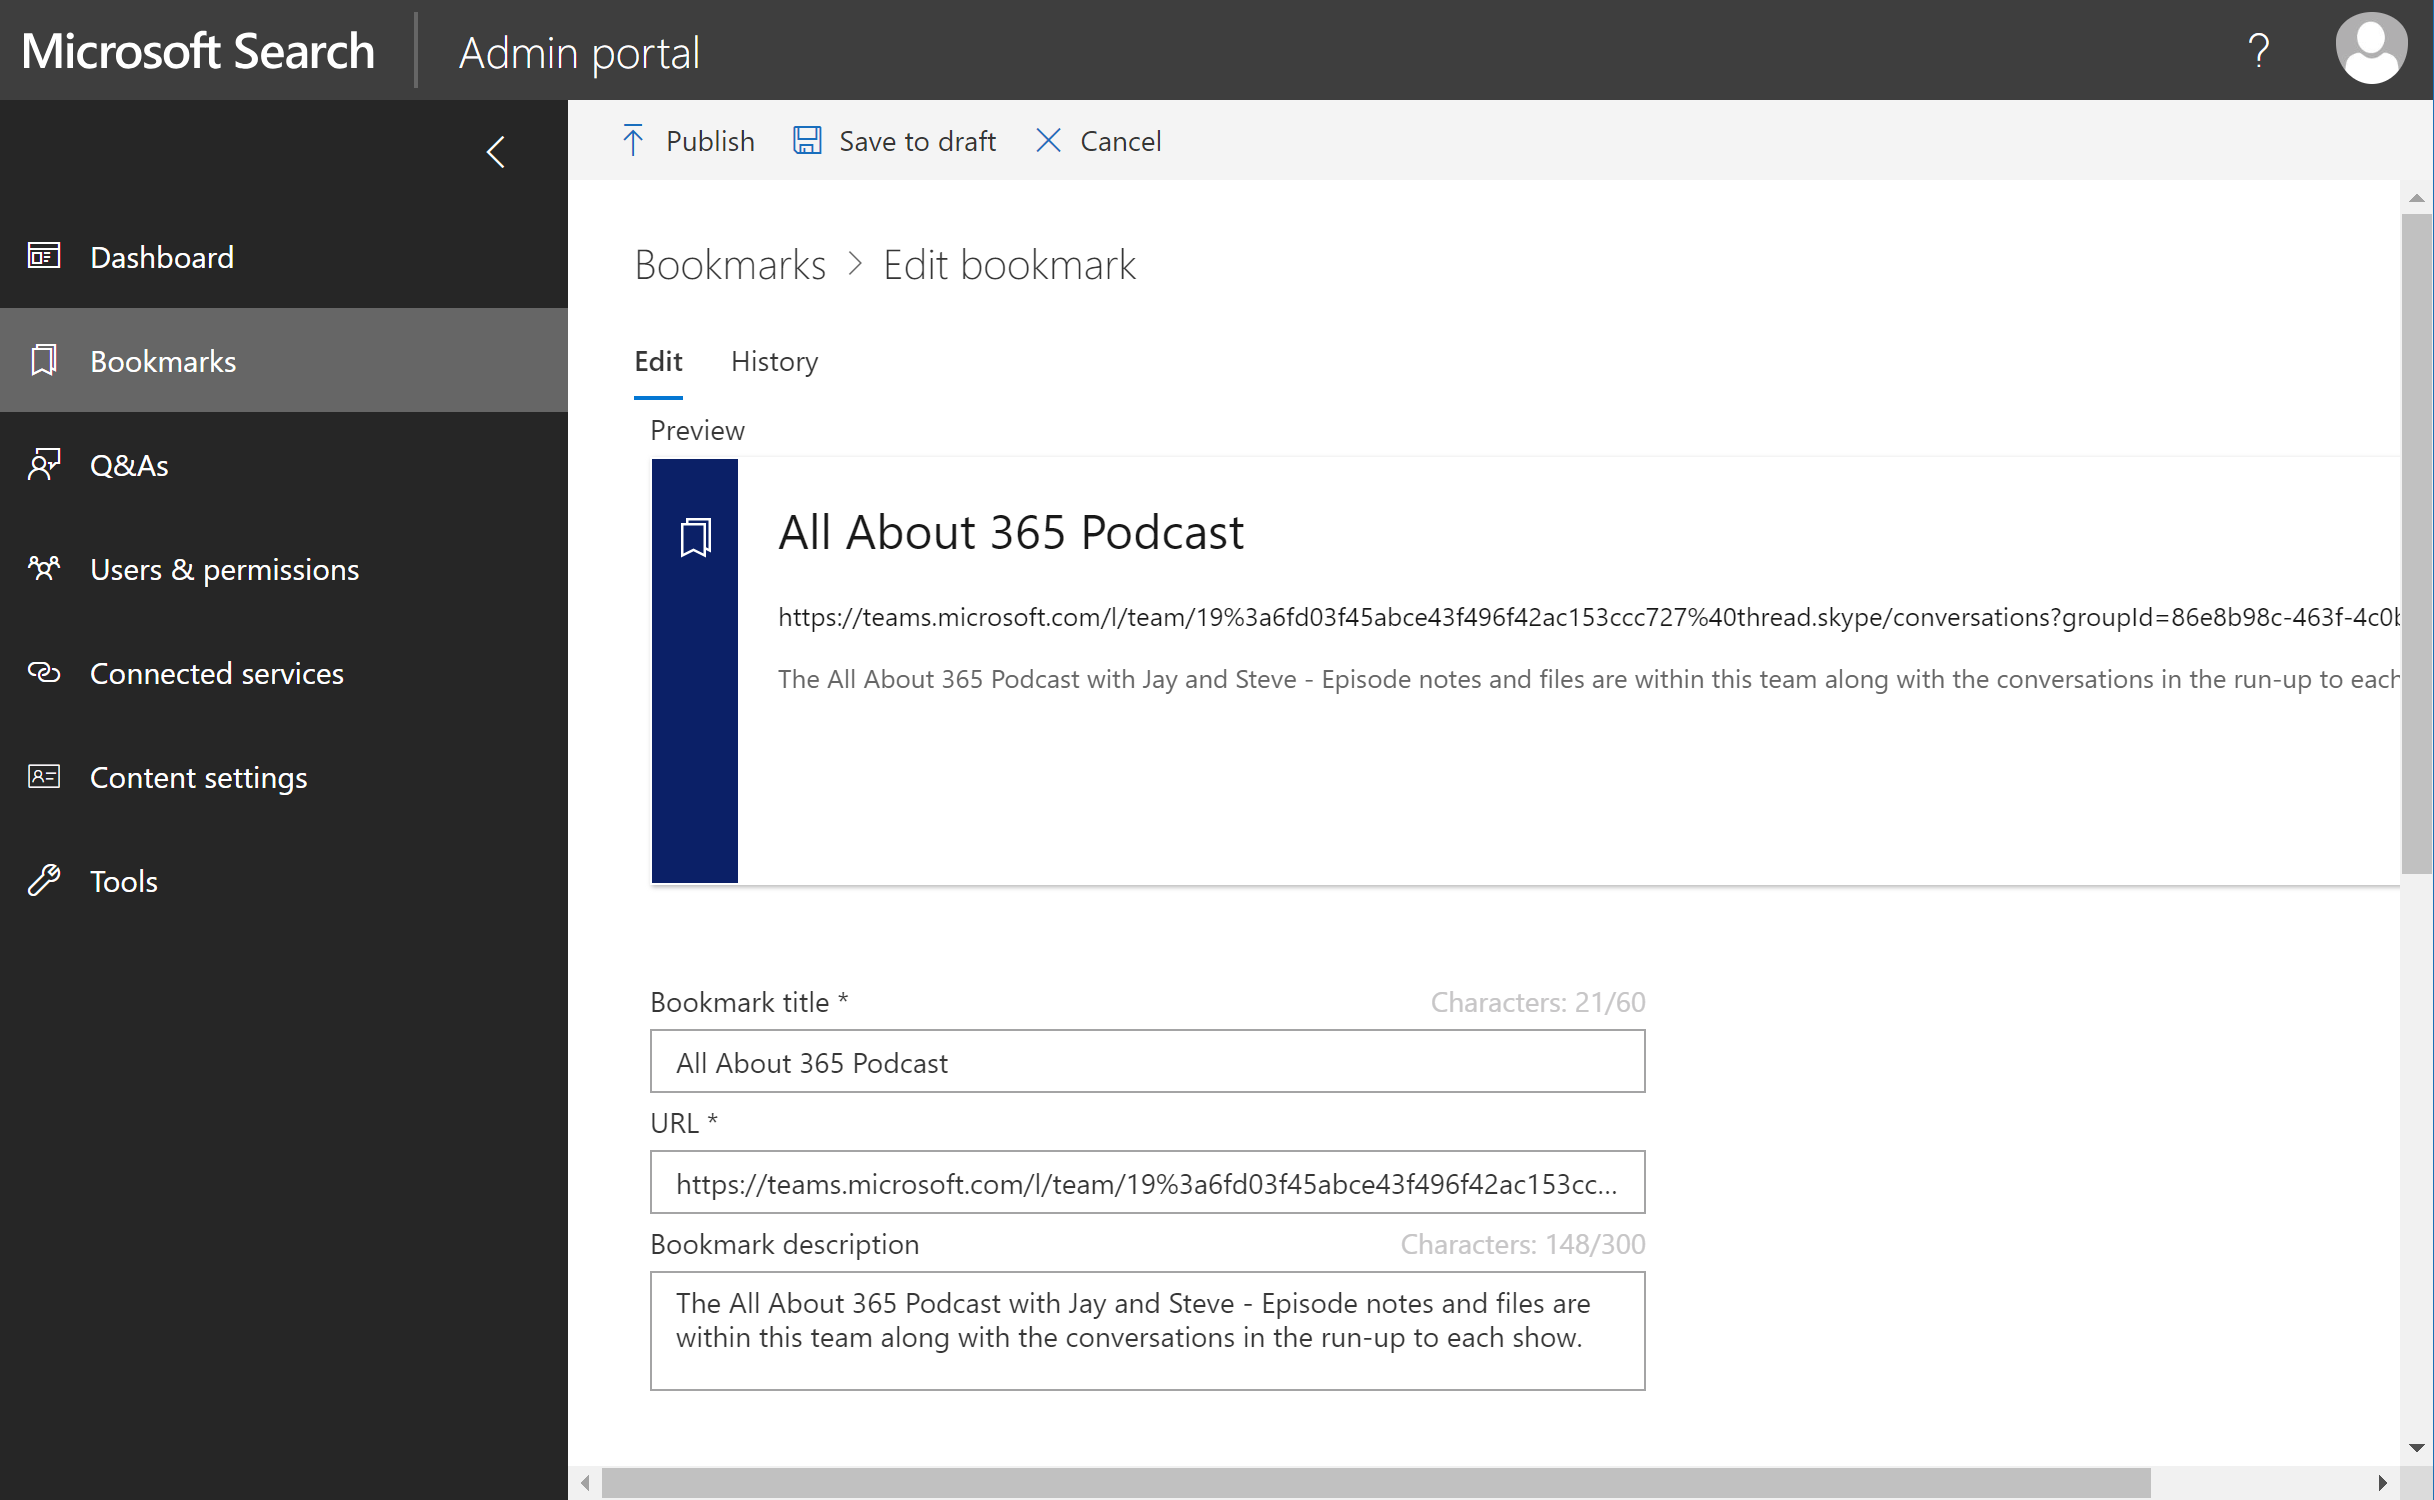
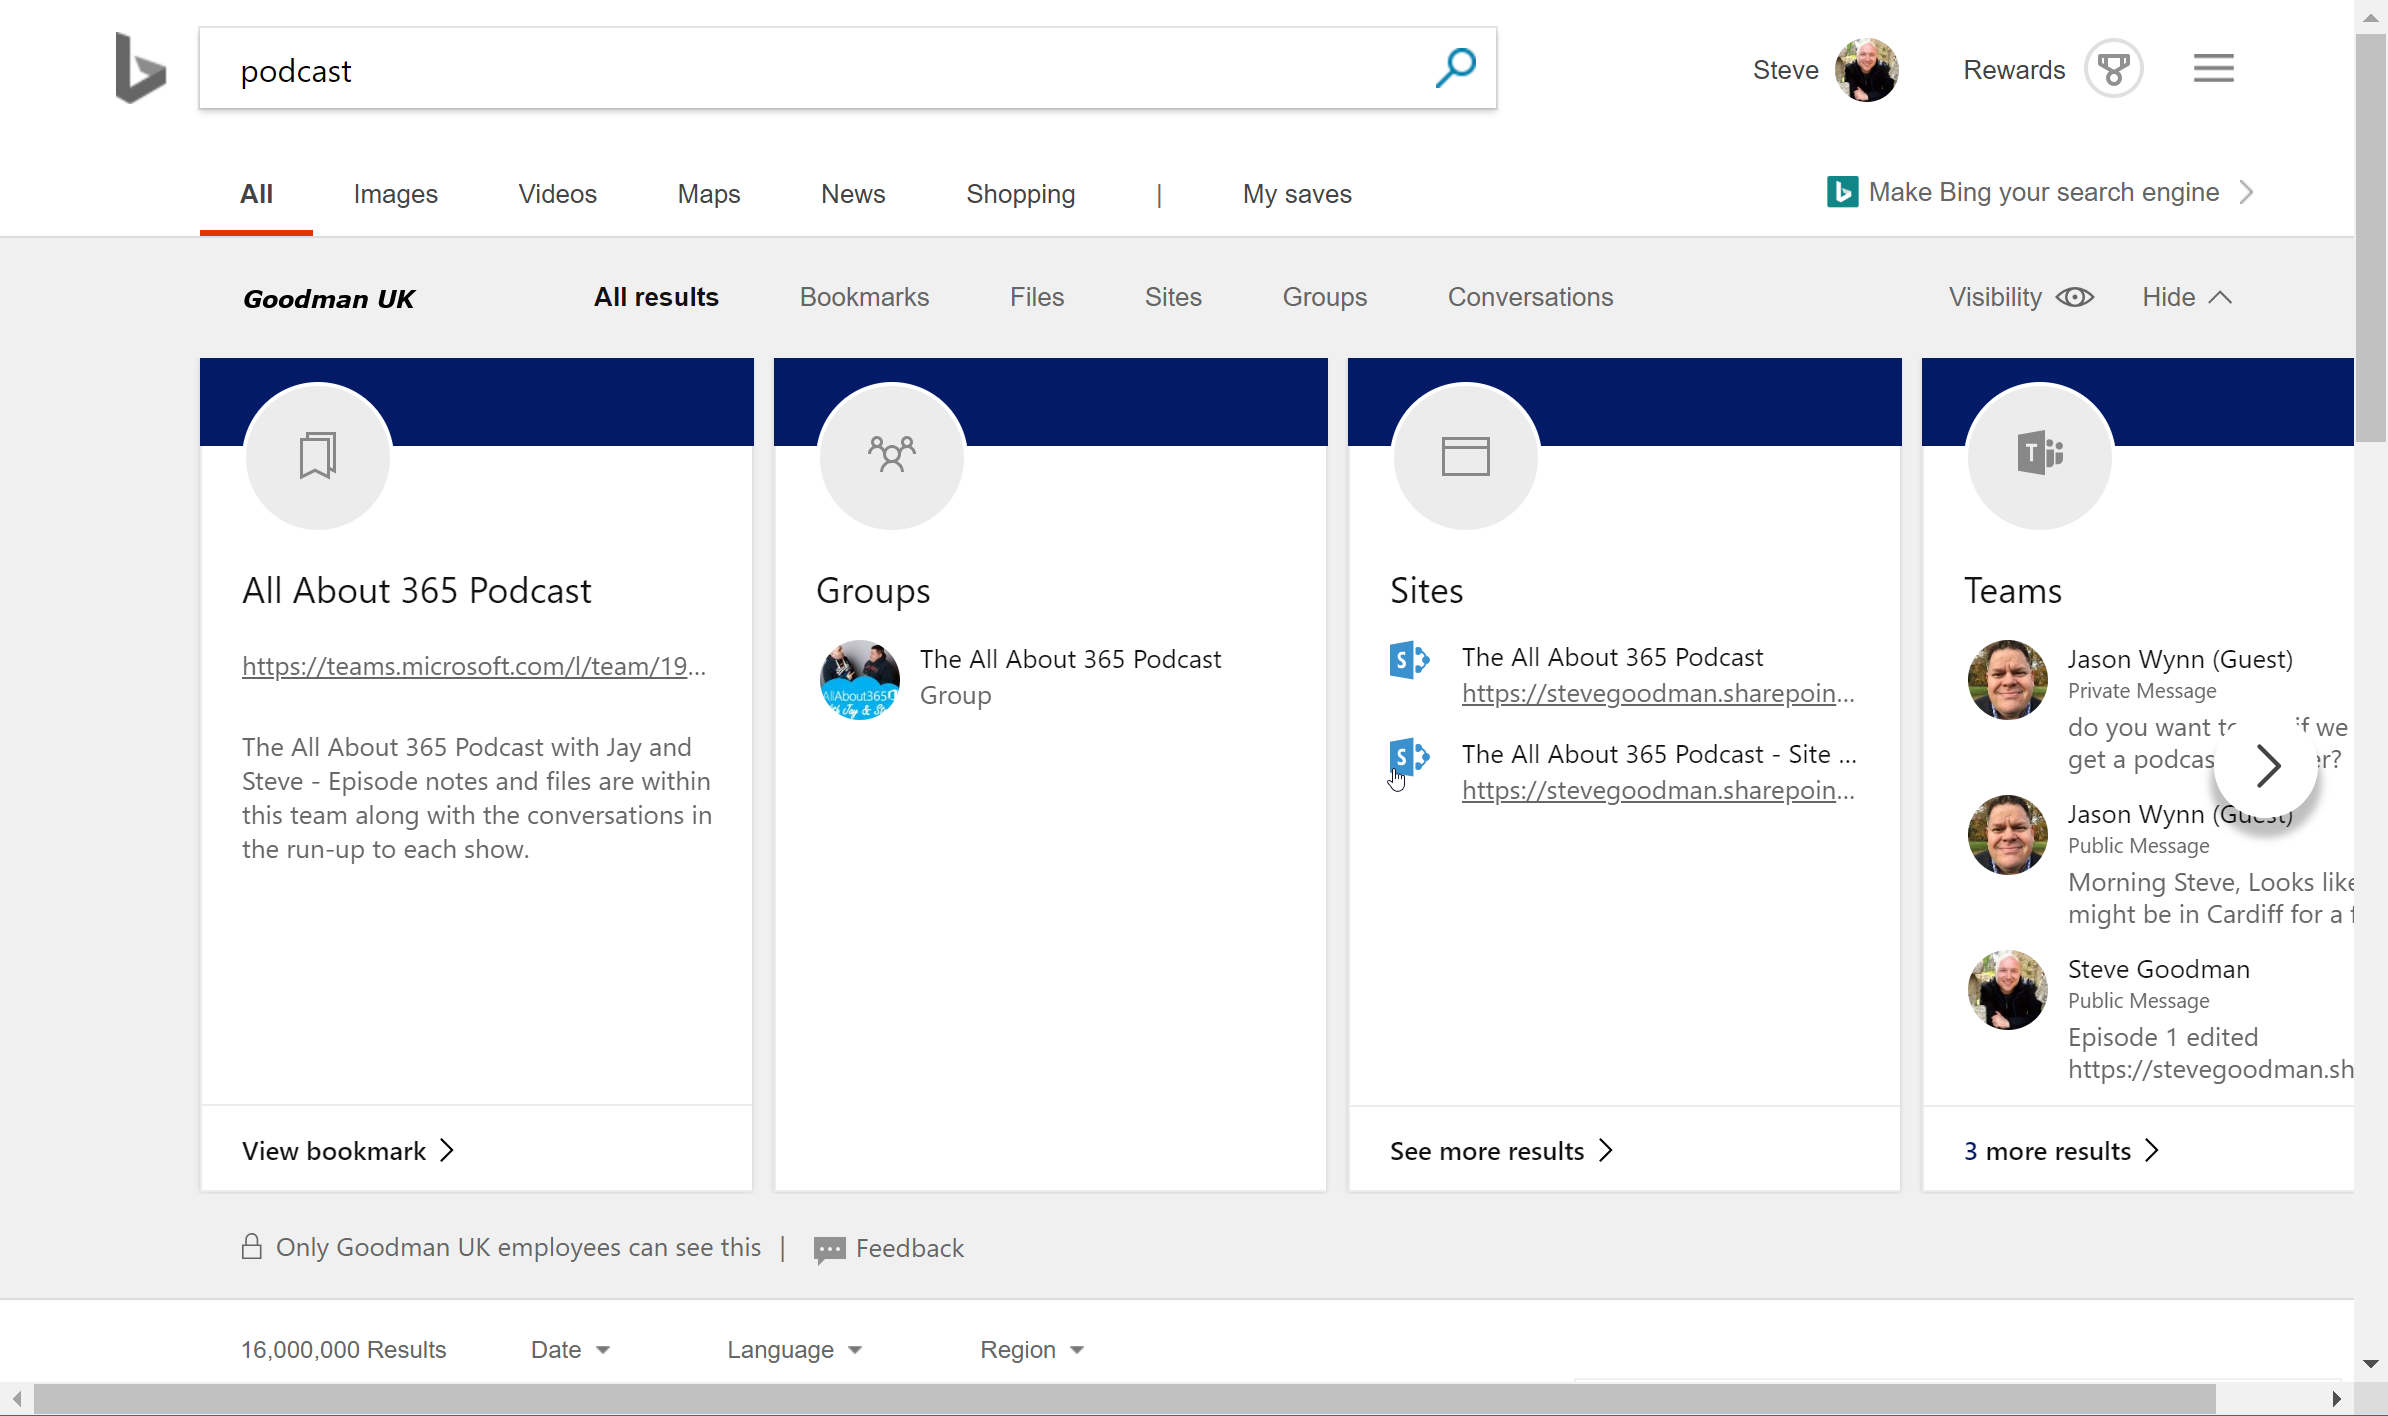
In the example below, we’re adding a bookmark for the All About 365 podcast. We want users to easily find it when they type in keywords like “podcast.” As we create our bookmark, we see a real-time preview of the bookmark, including a description and links to relevant content.
Once our bookmark is created, users can now search for terms relevant to the organization. And this way, they get good results. In the configuration, we can also import SharePoint Best Bets to leverage the existing work we’ve done. This allows us to add keywords to SharePoint search results.
From a user’s perspective, bookmarks appear alongside other search results from our organization, so you can direct them to the right content. They’ll also get information that’s potentially more relevant to them, such as:
- the files they worked on
- the people they chatted with in Teams and Yammer.
Summary
Microsoft Search is present throughout your Office 365 suite, from desktop applications to mobile devices. It’s important to familiarize yourself with Microsoft Search so users can view relevant information.