To create a Windows 11 or Windows 10 installation USB drive , you can use Rufus , MediaCreation , and many other tools.
But you can also create a Windows USB installation media and bootable USB with DiskPart .
Thus, using the command line and the command prompt, you can format, update the boot code of the USB flash drive volume, and copy the Windows installation files.
The result is a Windows installation USB drive that is UEFI and Secure Boot compatible.
In this tutorial, you will learn the steps to create a USB flash drive to boot a computer to install Windows 10 or install Windows 11 .
How to Create a Bootable Windows 10, 11 Installation USB Drive in Command Prompt
- Insert a USB drive into your PC and back up the data on it
- Then open a command prompt:
- How to Open a Command Prompt on Windows 10
- How to Open Windows Terminal on Windows 11
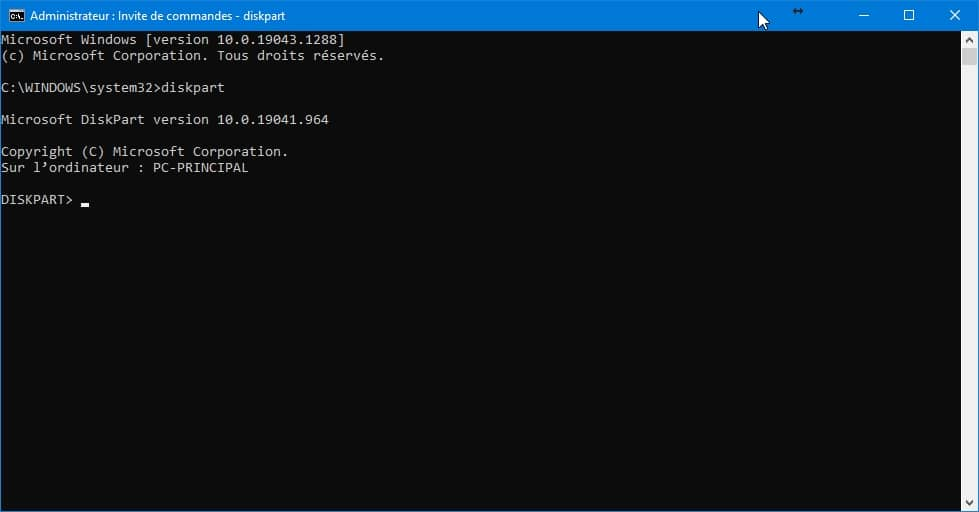
- Then type diskpart to open the command line partitioning tool interface
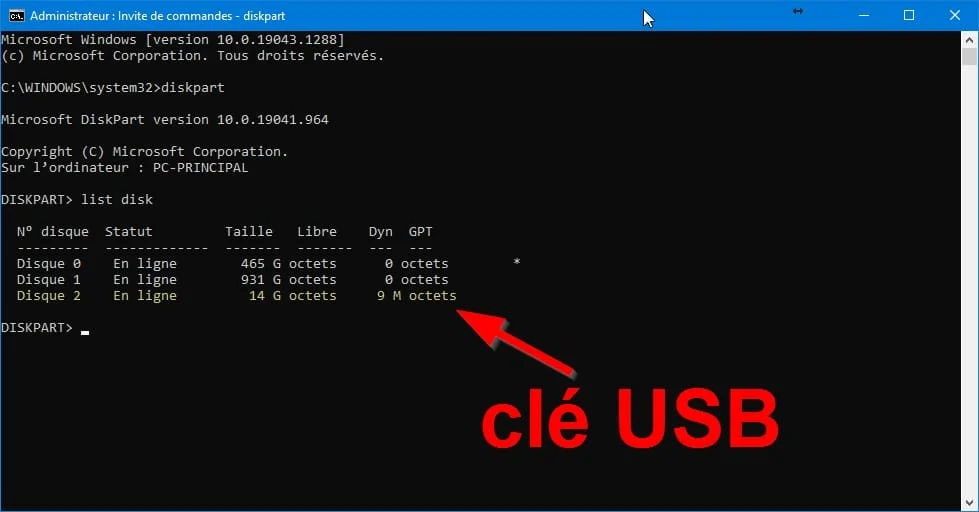
- Then list the disks:
list disk- And identify the disk number of the USB key . Locate it with the disk size. In our example, the USB key is on disk 2, in your case, it has a different number.
- Select the disk drive with the sel command and the disk number:
sel disk 2- Then empty the entire contents of the USB key with the diskpart clean command:
clean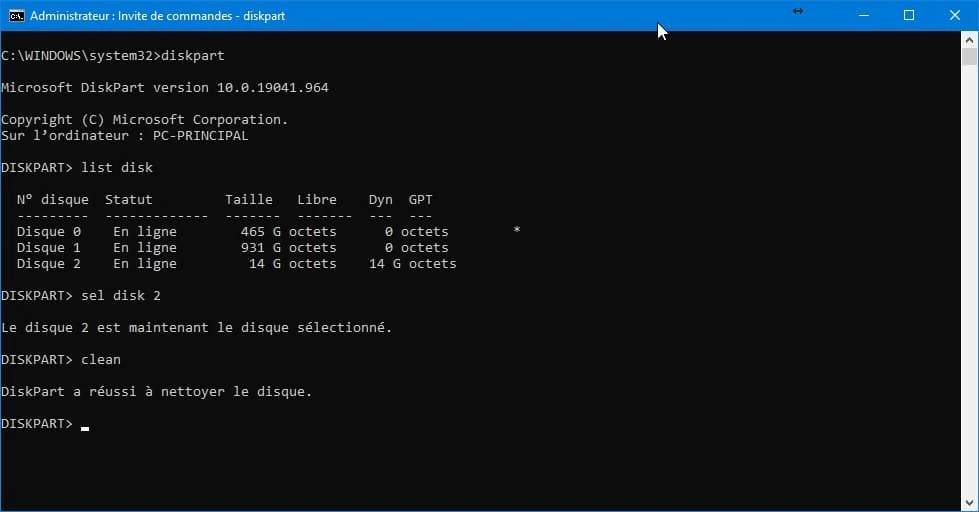
- Then create a new disk partition:
create partition primary- And select the latter to work with:
select partition 1- Then format the USB drive disk partition to FAT32 :
format FS=FAT32 quick
- Once the disk partition is formatted, assign a drive letter, for example, the letter M:
assign letter=M- Finally exit Diskpart:
exit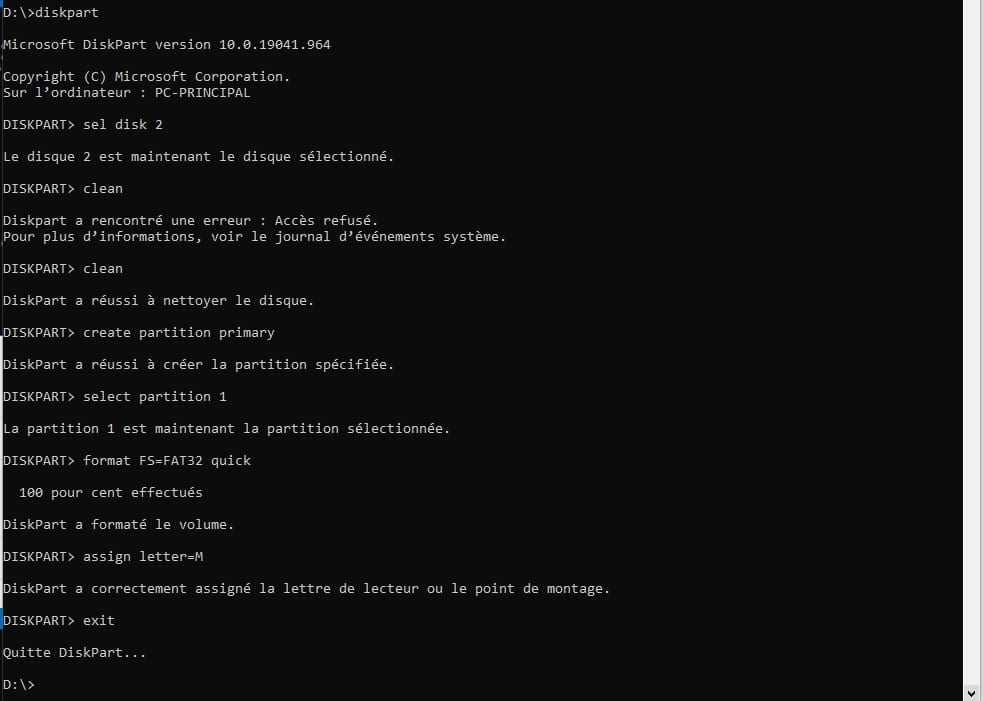
- Get the Windows 10 or Windows 11 ISO file:
- Then use PowerShell and the Mount-DiskImage cmdlet to mount the ISO file, correct the ISO file path in the command. This will create a virtual DVD-ROM drive:
PowerShell Mount-DiskImage -ImagePath "%USERPROFILE%\Downloads\Windows11.iso"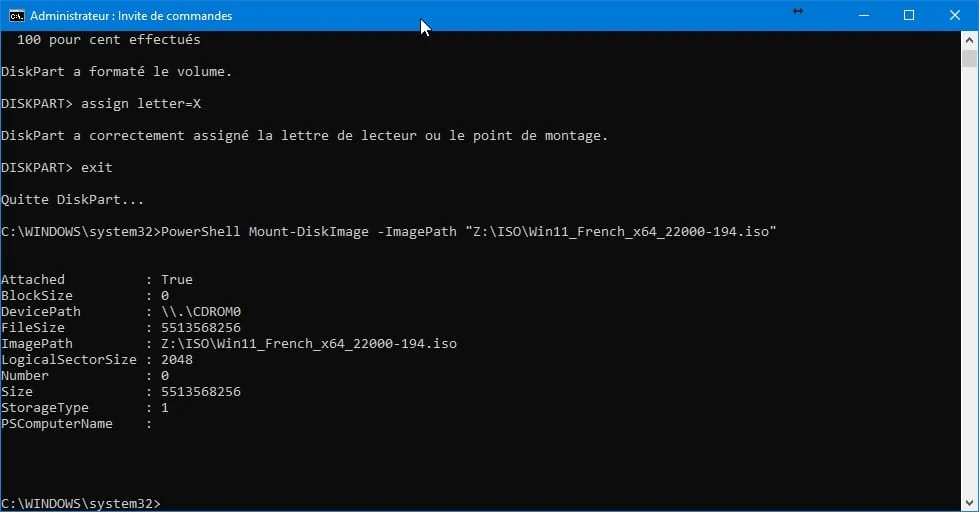
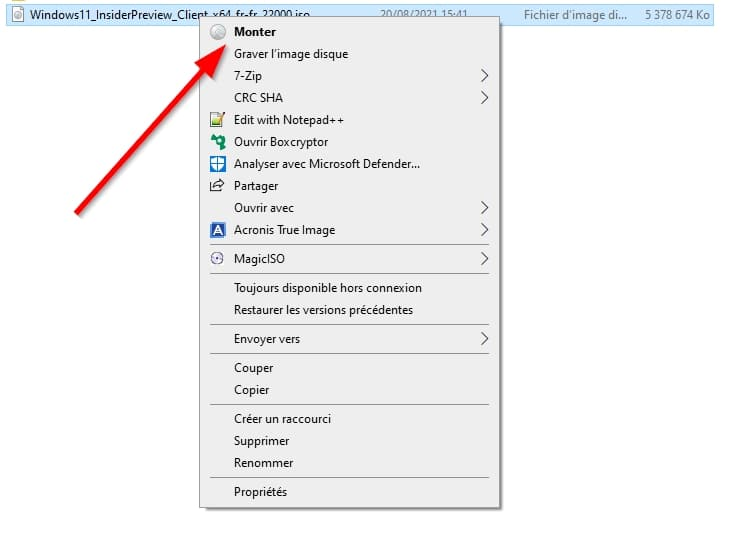
- Note that it is possible to mount the ISO file by right-clicking then Mount , if that is easier:
- Then reopen diskpart:
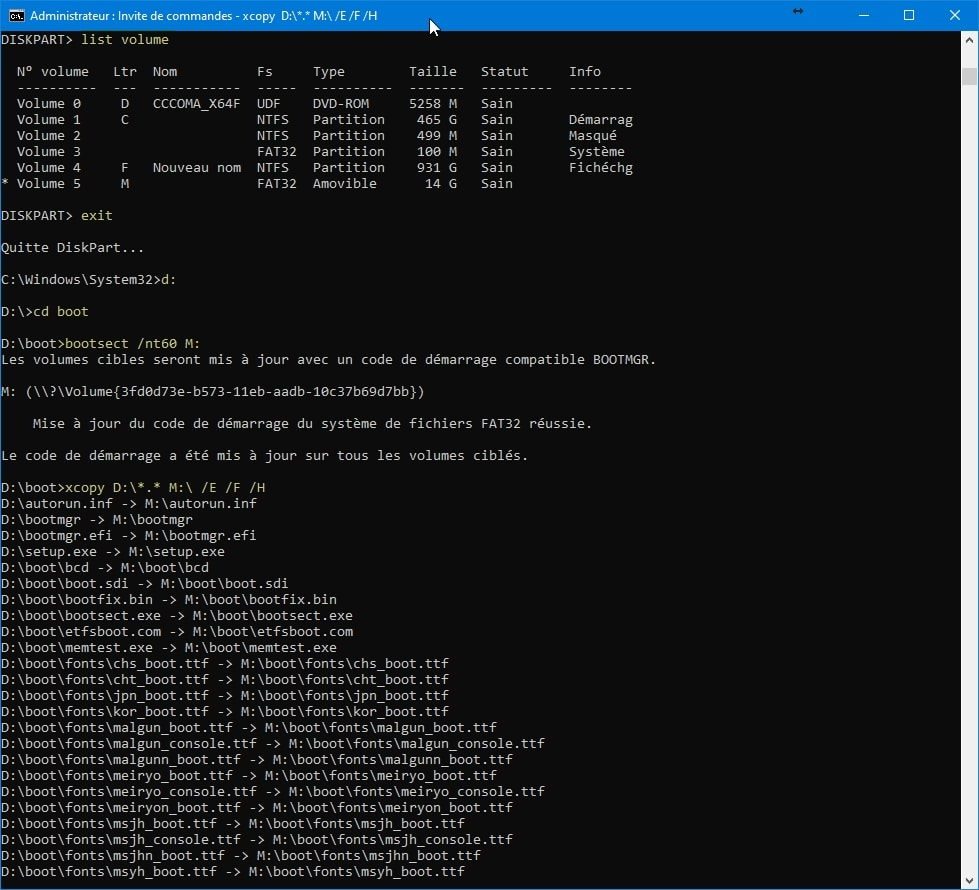
diskpart- List the disk volumes and determine the drive letter of the mounted ISO file:
list volume- So in this tutorial:
- D is the letter of the mounted Windows ISO file
- M is the disk partition letter of the installation bootable USB drive
At this point there may be an error in the install.wim file.
Why am I getting the install.wim error?
When we download a Windows 10 image from its official website, we should generally have no problems mounting it on a USB drive. This is because the files are compressed so they can be used on devices such as a USB drive. The problem occurs when we download a Windows image from another source, either because we need a more advanced version or because we need an earlier version that we cannot find on the official website.
Therefore, when we perform a simple operation such as dragging and dropping, File Explorer shows us an error stating that the file is too large. This is because the installation file we downloaded exceeds the maximum 4GB capacity of a FAT32-formatted USB drive. While NTFS-formatted USB drives allow for higher storage capacity, UEFI-based hardware requires a FAT32-formatted drive to boot a Windows installation.
Therefore, in case we need to clean install Windows from a USB device, we will tell you how to solve this problem using the DSIM tool.
Use the DSIM command to split the WIM file
The DISM (Deployment Image Servicing and Management) command is a tool developed by Microsoft , based on the command line, which will allow us to perform maintenance and repair of Windows images. The DSIM commands will allow us to split WIM files into other smaller files. To do this, we must perform the following steps.
Create a bootable recovery drive
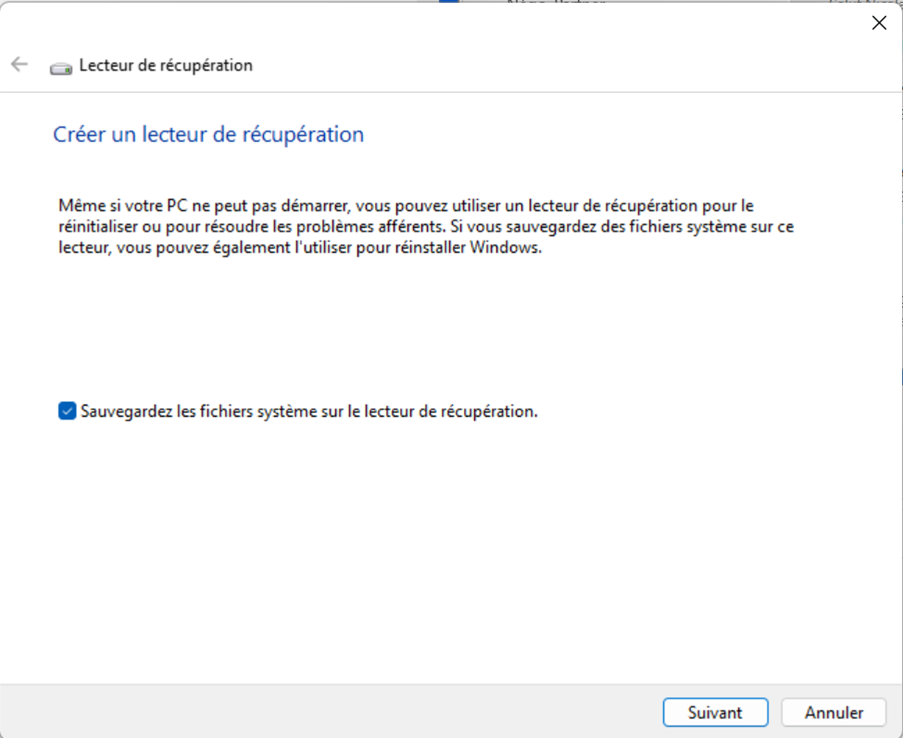
The first step we need to take with our Windows PC is to connect a USB drive with a capacity of at least 8 GB and create a bootable drive on it with Windows Recovery Media Creator. To do this, we will need to type “recovery drive” in the search box next to the Start button.
This will bring up a new window where we must make sure to uncheck the “Back up system files to a recovery drive” option. When doing this, we must remember that all files contained in the USB drive will be lost once formatted. Once unchecked, click “Next” to continue.
Next, the application will ask us to connect a USB storage unit of at least 1 GB, warning us that all content will be erased. Likewise, it also offers us the option to create a recovery disk on a CD or DVD, so if we are more interested in this, we can also create it.
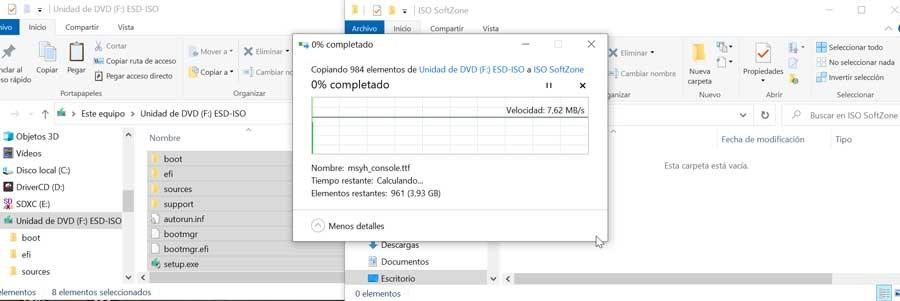
Mount the ISO file and copy it to the hard drive
Later, we will open File Explorer and double-click on the downloaded ISO file to mount it as a virtual drive. Now, we leave the Explorer window open and press the shortcut “Ctrl + N”, which will help us open a new window. In this new window, we will create a folder on the hard drive and copy the contents of the mounted disk from the other window. We can pass the files by selecting them all and pressing “Ctrl + C” and in the new folder, we paste them using the command “Ctrl + V”. We wait a few seconds for all the contents to be transferred to the new folder.
Use the DSIM command to split the WIM file
In the next step, we’ll type in the Windows Command Prompt search box and run it as administrator. Once it appears, we need to copy the following command, but change “Folder Name” to the name of the folder we created in the previous step and press “Enter” to confirm. In the accompanying image, we can see an example of the process.
Dism /Split-Image /ImageFile:C:\folder_name\sources\install.wim /SWMFile:C:\folder_name\sources\install.swm /FileSize:3800
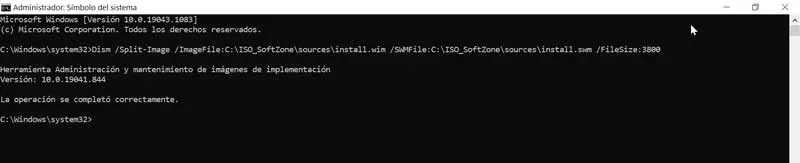
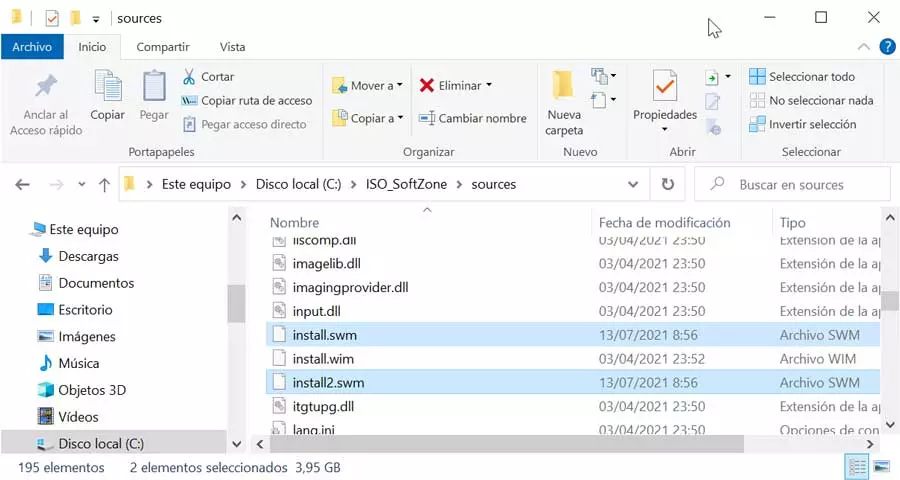
Once the operation is complete, we must verify that in the “Sources” folder we find two new files such as Install.swm and Install2.swm along with the original Install.wim file and that we can delete it from the folder we created.
At this point we resume copying files between the Windows installation files directory without install.wim and the USB key.
Congratulations: You have successfully created a bootable Windows 11 key.