Email encryption with Office 365 and Azure Information Protection
We will delve deeper into the previous article Office 365 Email: Message Encryption and Security with Azure Information Protection .
First, Azure Information Protection (AIP) is part of the Mobility + Security extension for Office 365. With Azure Information Protection, you can create advanced policies to protect your data. To do this, you can create labels to classify documents and emails, and then create policies based on these labels.
It’s worth noting that data loss prevention (DLP) tools like this are essential if your business handles any type of sensitive information, not just personally identifiable information (PII). Implementing DLP makes it easy for team members to protect data and significantly reduces the risk of sensitive information leaking beyond the intended recipients.
This guide will show you how to automatically encrypt emails sent outside your company that contain data marked “confidential.”
Enabling Azure Information Protection
If this is the first time you’re using Azure Information Protection in your tenant, you’ll first need to enable it:
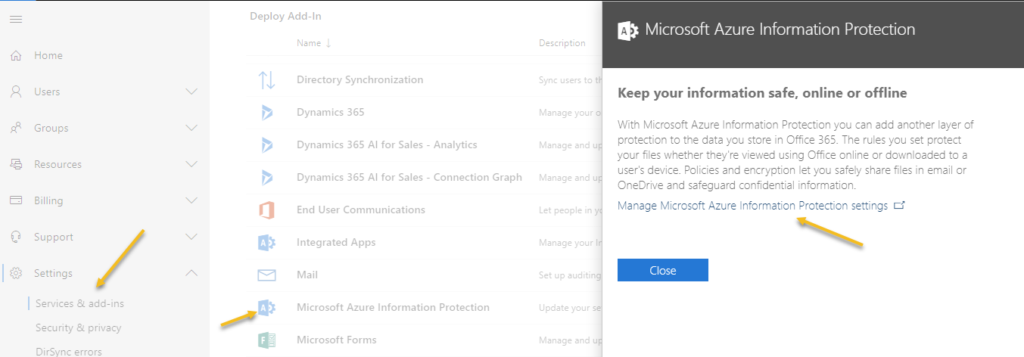
- Log in to the Office 365 Admin Console and navigate to Settings -> Services & Add-ins
- Click on Microsoft Azure Information Protection
- Click the link to manage Microsoft Azure Information Protection settings
Enabling Azure Information Protection
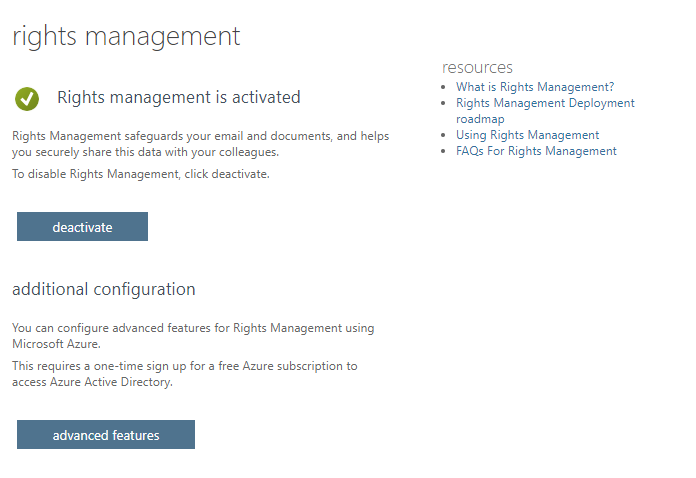
- Then click the button to activate. Once the service is activated, this page will have a button to access advanced features. (Note: The activation process may take some time.)
Azure Information Protection Rights Management
Information protection labels
Once the service is activated, you can click the Advanced Features button to access the Azure portal. If you don’t already have an Azure account, you’ll be prompted to create one with a free subscription.
If you can’t get there directly, use the search bar at the top of the screen to search for Azure Information Protection. You’ll then be directed to the Azure Information Protection blade.
- Under the Classification section, click Labels. To create a new label, click the New Label link.
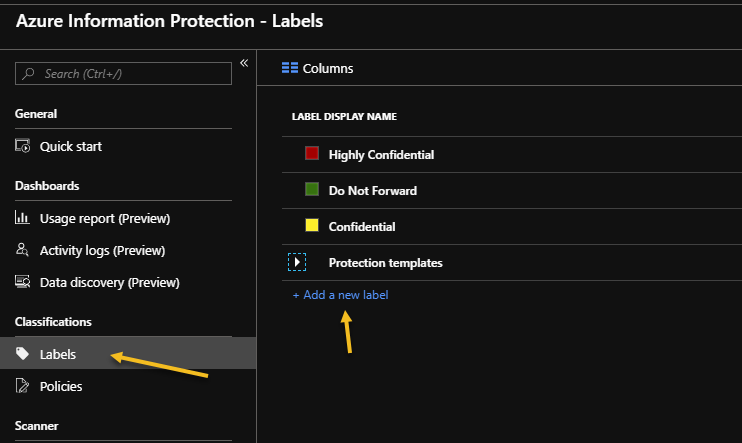
Azure Information Protection Labels
- Enter the information for your label. Give it a name (in this example, I used the name “Confidential”) and enter a brief description.
- Scroll down to the button that says: “Show the information protection bar in Office applications” and turn it on.

Azure Information Protection display labels
- Click Save at the top of the slide to save your label.
- Scroll down to the bottom of the slide. You’ll see a line of text that says “Label ID.” Copy this ID code into a Notepad window. You’ll need it later:
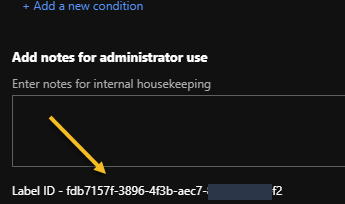
Azure Information Protection Label ID
Creation of the policy
The next thing to do is create a policy for publishing your labels.
- On the Azure Information Protection page, under the Classification section, click Policies.

Azure Information Protection Policies
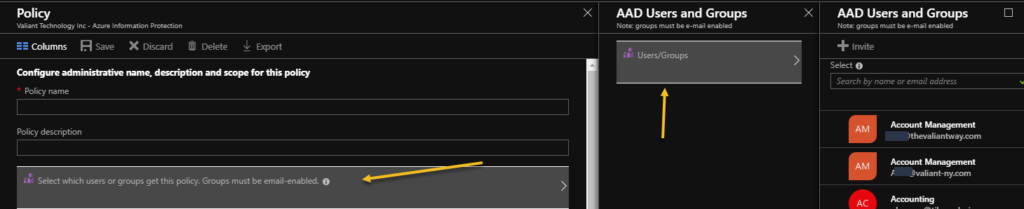
- This opens the Policy section. Give your policy a name and a brief description.
- Click the Select users and groups section to choose who this policy will apply to.
This opens another section where you can select users and groups. When testing, it’s best to limit the policy to as few people as possible (or even just yourself).
Create a new Azure Information Protection policy
Note that only users or groups that have an email address can be selected.
- In the policy section, click Add or remove labels.

Adding a new label
- Select the label you created on the right side. Save the policy.
Microsoft Office Information Protection Bar
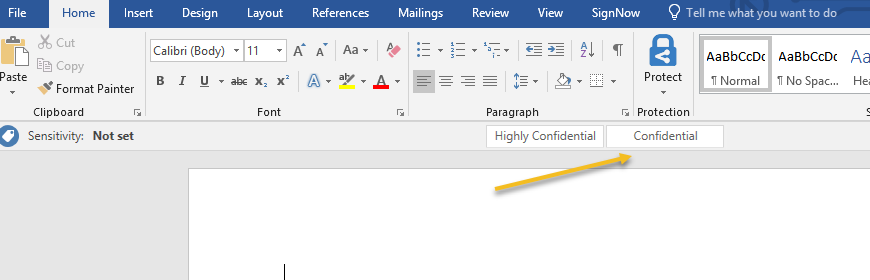
Once the policy is updated, you will notice that the Information Protection bar appears in Microsoft Office applications. However, you may need to close and reopen Outlook/Word/Excel to get the update:
New Microsoft Office Information Protection Bar
You can select the label to apply it to the content, but for now, no action is associated with the label. The next thing to do is to create mail flow rules to apply email encryption.
Creating the rules
- Log in to the Office 365 admin portal and navigate to the Exchange admin center. Click the Mail Flow section, then click Rules.
- At the top, click the plus symbol to add a new rule.
- Enter a name such as “Encrypt Email with Confidential Tag”.
- In the “Apply this rule if” section, choose “The recipient is located outside the organization”.
- Click Add Condition to add a second condition. (You may need to click the More Options link to display the Add Condition button.)
- Choose “A message header includes one of these words.”
- On the right, click Enter Text and enter “msip_labels”.
- Click Enter Words and type “MSIP_Label_” followed by the label you copied earlier, followed by “_Enabled=True;”
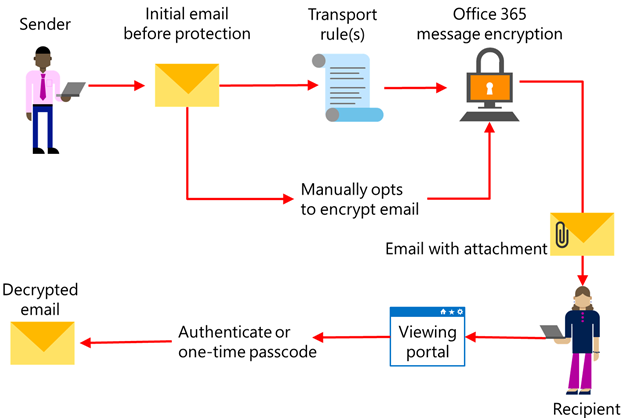
- In the “Do the following” section, choose Change message security… and then Apply Office 365 message encryption and rights protection to the message. Then, choose the “Encrypt” option in the pop-up window:
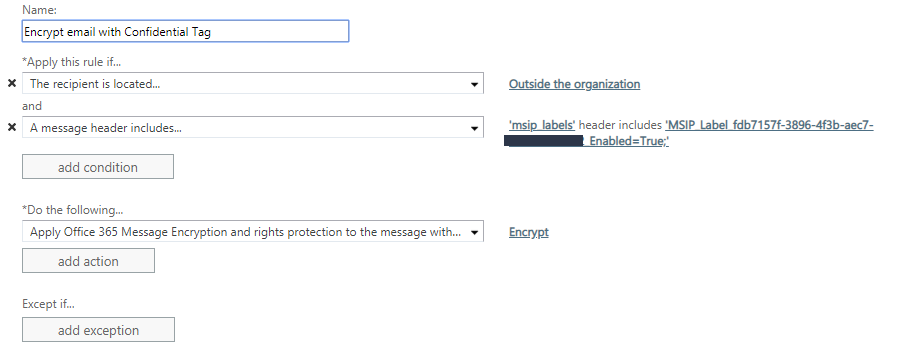
- Save the rule.
- Click the plus symbol to create a second rule.
- Call this one “Encrypt emails with confidential attachments.”
- In the Apply rule if section, choose the same setting for the recipient located outside the organization. Click “add condition” to add the second condition.
- Choose any attachment that has these properties, including any of these words
- Click the plus button to add the property.
- Choose Specify a custom attachment policy
- In the property name, put “MSIP_Label_” followed by your label ID, followed by “_Enabled”.
- In the Value section, enter True.
- In the “Do The Following” section, choose the same setting “Apply office 365 message Encryption and rights protection” and choose Encrypt.
- Save the rule.
Send/Receive Test
It can take up to two hours for the rule to fully propagate and be active on matching emails, so give it some time before sending a test message.
Once the rules are in place, any email marked with the Confidential tag will be sent as an encrypted message, and therefore any email containing an attachment marked with the Confidential tag will be sent in encrypted form.
Sending
When you create a new message in Outlook, you’ll notice the information bar below the ribbon. This bar displays all the labels you have available. Here’s what it looks like when you send an encrypted message:
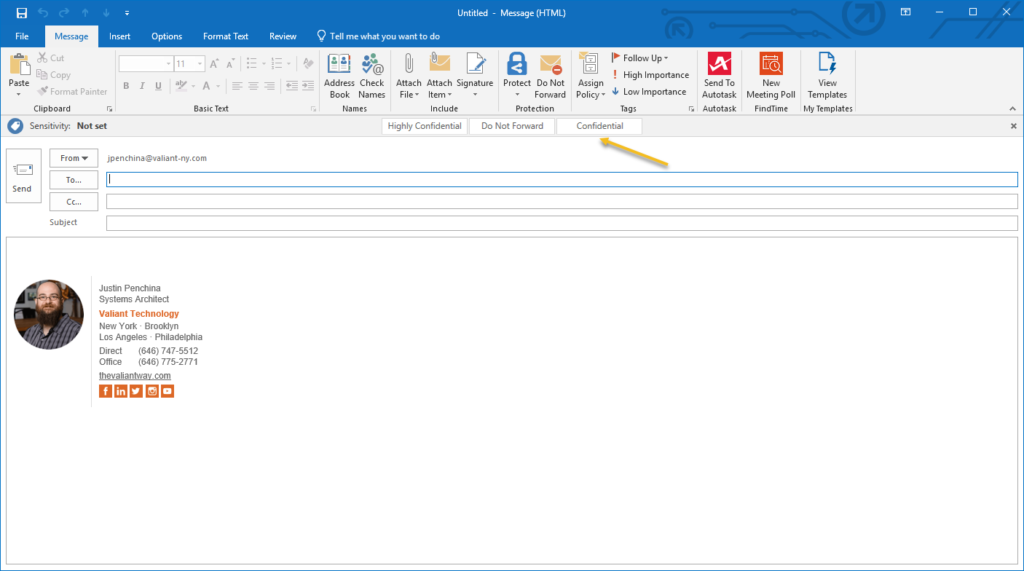
Microsoft Office Information Protection Bar
When you select the label you want, it appears on the left side of the bar. Then compose and send the email as you normally would.
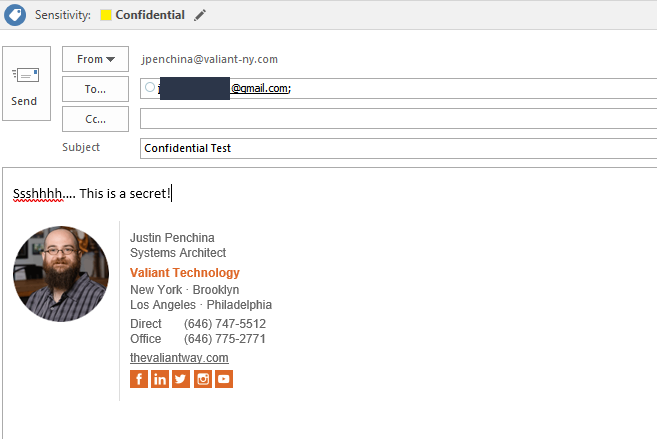
Outlook new message window with sensitivity label
Reception
The recipient will receive an email from you with the subject you used:

Encrypted email preview in Gmail
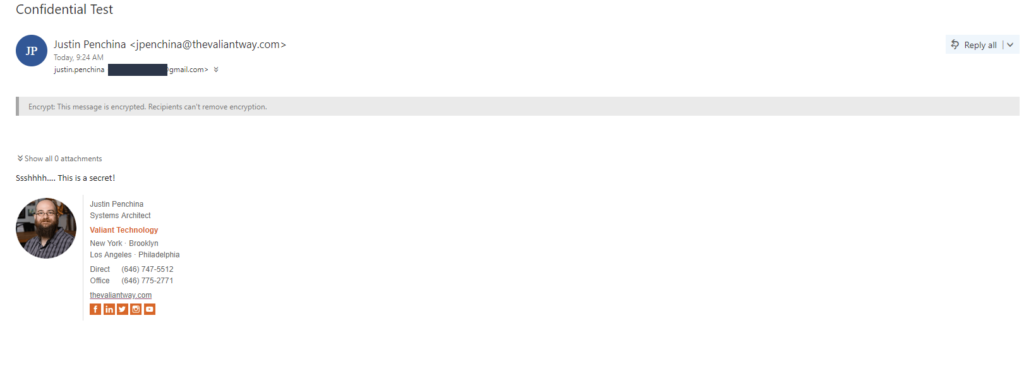
When the recipient opens the message, he is informed of the presence of an encrypted message that he can consult:
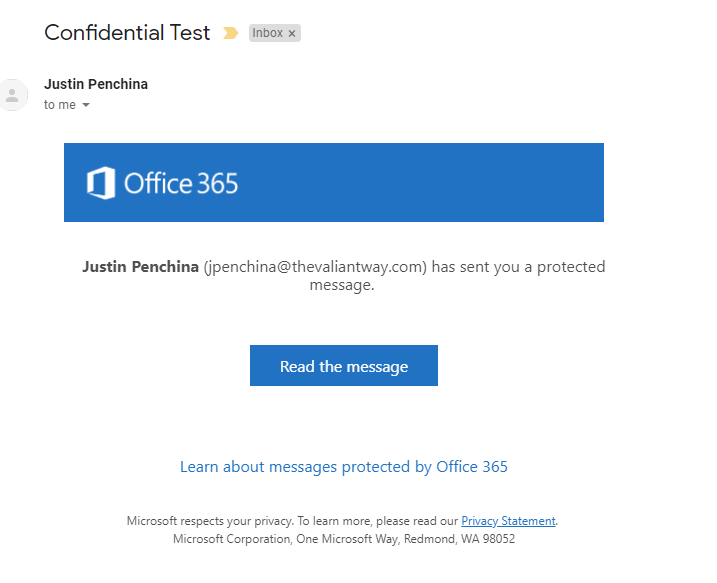
Encrypted email body
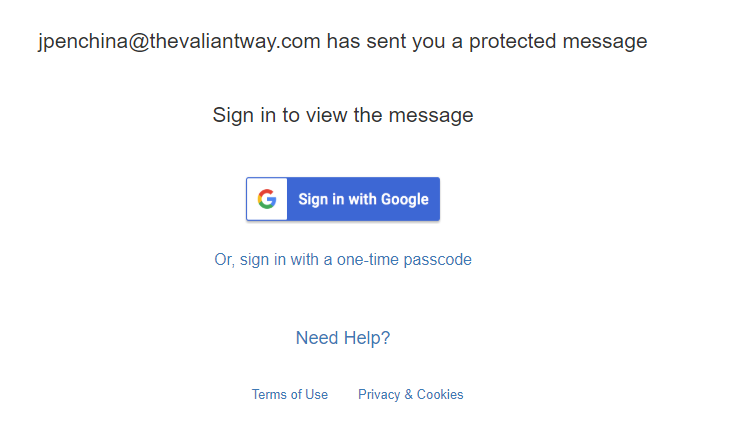
When the recipient clicks to read the message, they’ll be presented with two options. They can either sign in with a Microsoft account (if they have one associated with their email), or they can receive a one-time code:
Gmail Encrypted Message Prompt
Once the recipient is authenticated, the message appears in their browser. They can view it, download attachments, and even reply from the page.
Microsoft Outlook: Decrypted Email Message
So, there are many other security measures you can implement using labels and policies. Especially since Azure Information Protection allows you to apply document-level encryption to files with labels and policies, and Azure Information Protection P2 will even automatically apply labels to files containing sensitive information (like credit card numbers).
How does your company use Office 365 to secure sensitive files and prevent data loss to reduce risks? Let us know in the comments section below!