Office 365 Security & Compliance Center: Activity Alerts
Do you have more than five global or service administrators in your tenant? Do you know what changes are being made daily in your tenant across your services? Having too many administrators can create chaos between services if communication is lacking. As an Office 365 global administrator, shouldn’t you know what changes are being made? Ultimately, searching through audit logs isn’t an ideal way to spend your time, not when you can automate alerts in Office 365 instead.
Enter activity alerts. Creating activity alerts is a great way to keep you informed about changes in your tenant. They can alert you about services or users in your tenant based on certain attribute criteria in the audit log. You can see the full list here.
Global administrator accounts can be compromised. If auditing isn’t enabled, it will be difficult to determine what, if anything, has been changed in your tenant. Here’s an article showing compromised global administrator accounts for sale on the dark web.
How to set up activity alerts
First, you need to enable auditing and then create an activity alert test.
Make sure auditing is enabled in your tenant
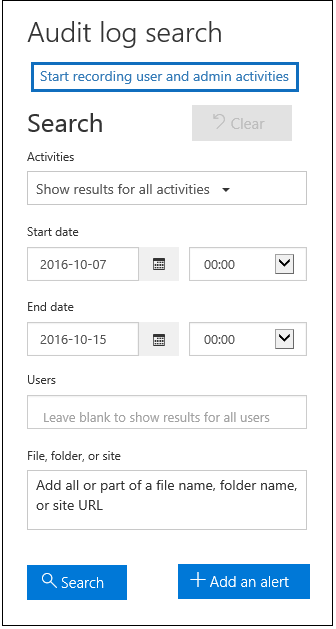
Log in to the Admin Portal and go to Security & Compliance. Click Search & Investigation, then click Audit Log Search.
If auditing isn’t already enabled for your tenant, we’ll enable it now. First, click Start Recording User and Admin Activities. A dialog box appears. Click Turn On. A message appears stating that the audit log is being prepared and that you’ll be able to search it in a few hours.
If you want to enable via PowerShell, you can do so with the following command.
Connect to Exchange Online Protection and the Security & Compliance Center PowerShell module. Finally, run the following:
Set-AdminAuditLogConfig -UnifiedAuditLogIngestionEnabled $trueCreating activity alerts
We’ll look at an example of transport rule creation by global administrators. This is very useful if global administrators across the world make changes that you’re not aware of. A compromised Admin account could create a new transport rule without your knowledge. It could then send your email to external email addresses. Transport rules aren’t something you create and edit every day. Still, they might be worth reporting if you have a large, complex environment with hundreds of rules in place.
Orders
For a list of activity alert parameter sets, you can refer to the following article here. Take note in the article of the section for “-recordtype”. This will help you label the alerts. Also, if you do not specify the “-userid” parameter, the alert will apply to all users in your tenant.
The basic elements we need are:
New-ActivityAlert
- Name (the name of your alert)
- Operation (the executed command)
- Notifyuser (the email address to send the alert)
- UserId (the alert recipient, i.e., the global administrator accounts in our example.)
- Description (obvious here)
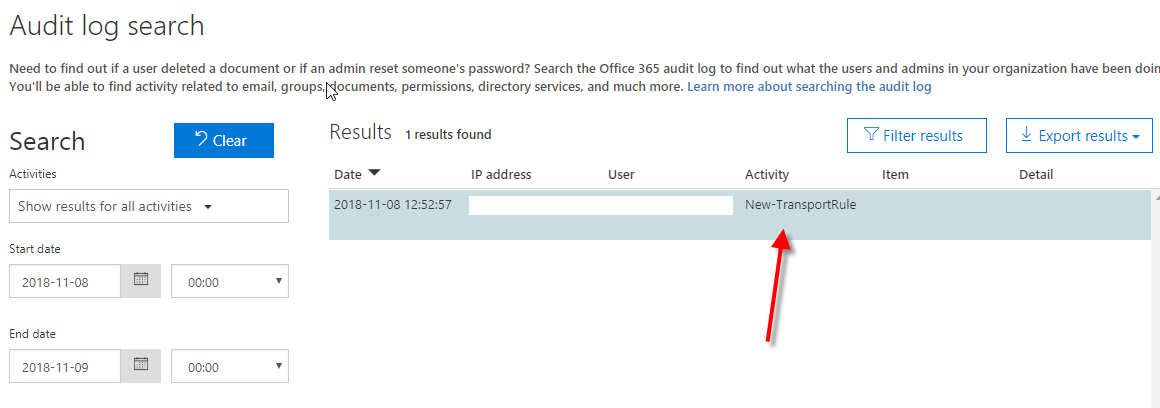
For example, let’s test transport rules. I’d like you to create a basic transport rule in your Exchange admin portal for testing purposes. If you’re not familiar with creating a transport rule, you can learn it here. Once the transport rule is in place, you can return to the Security & Compliance Center. Next, go to Search and Investigation and Audit Log Search. In the Users section, enter your administrator account name, set the date to today, and then click Search.
The results are displayed in the Activity section. The “New-TransportRule” entry in the audit log.
We can create an activity alert for any executable command in Office 365 and record it in the audit log. This is a great way to create new activity alerts for setting changes in your tenant.
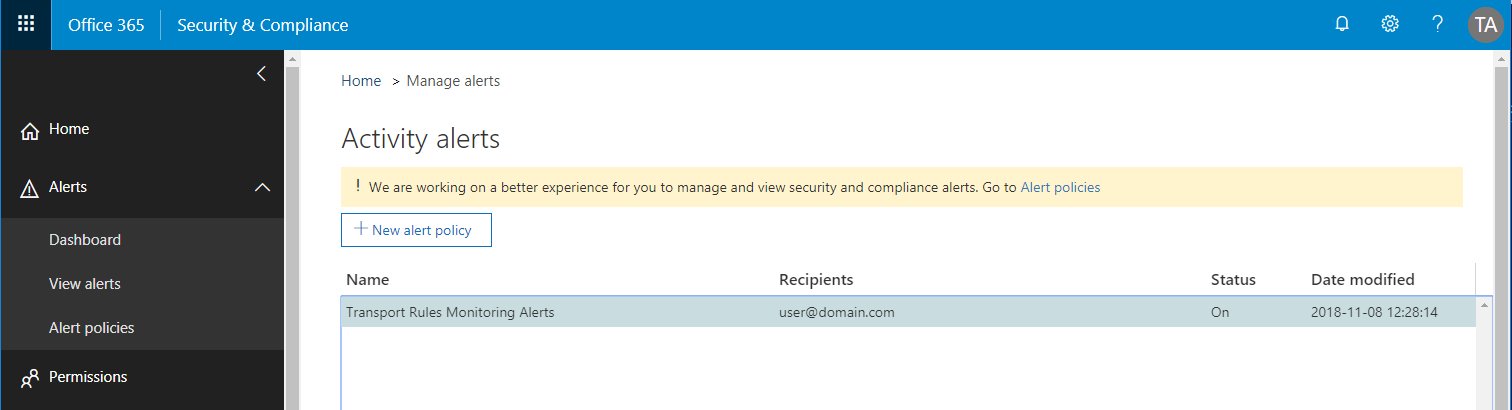
Managing activity alerts via the portal
Log in to the Office 365 admin portal and navigate to the Security & Compliance Center. Expand Alerts and select Alert Policies. The Manage Activity Alerts section is not listed initially. To access the management portal, you must first create an activity alert using PowerShell. Once you create an activity alert, you will be able to see the management area in the portal.

Une fois que vous aurez créé une alerte d’activité, vous serez en mesure de voir la zone de gestion dans le portail.

Creating a Transport Rule Activity Alert
Let’s create a new alert for each time someone creates, edits, or deletes a transport rule.
Connect to the Exchange Online Security and Compliance Center PowerShell module. Run the following. Update the settings if necessary.
New-ActivityAlert -Name "Transport Rules Monitoring Alerts" -Operation new-transportrule,set-transportrule,remove-transportrule -Description "Creation, Modification and Deletion of Transport Rules" -NotifyUser "user@domain.com" -RecordType ExchangeAdmin -Severity High -Type Custom
After that, go back to Alert Policies. Click on Activity Alerts at the top of the screen.
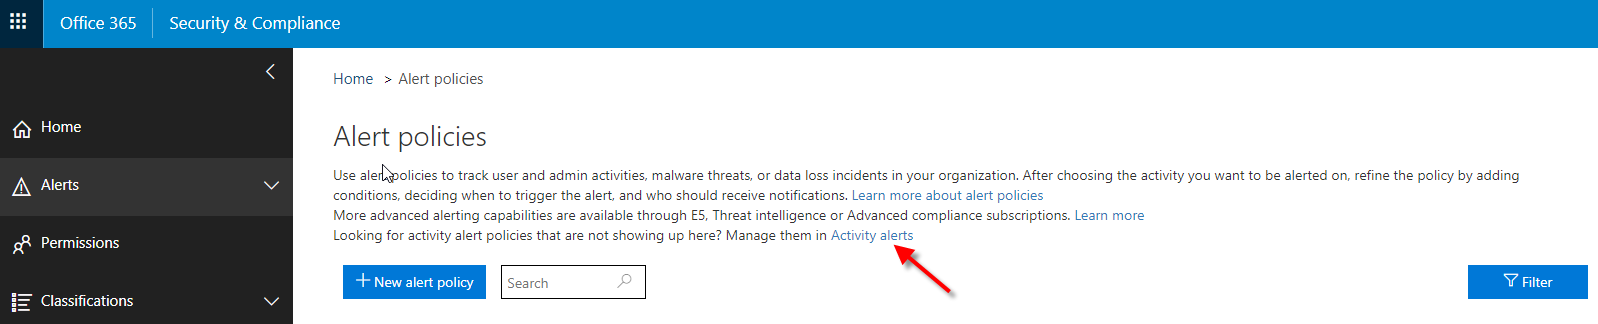
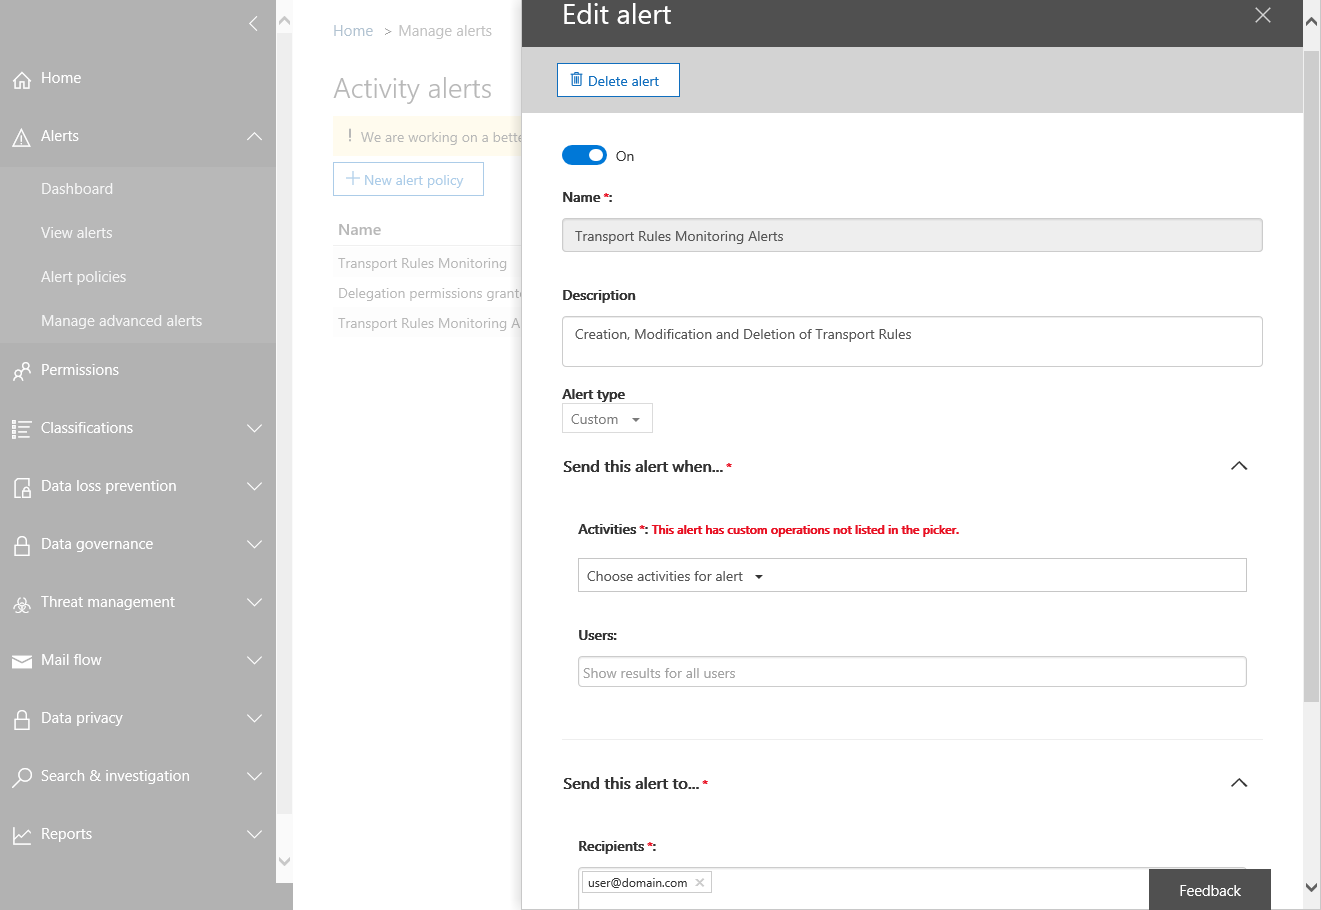
You will then access the activity alert management page.
Looking at the alert in the portal, you’ll see that you can’t see the activities because it’s a custom rule set. Run the get-activityalert command in your PowerShell session. This will display the actual properties of the custom rule. You can find the details here about get-activityalert commands.
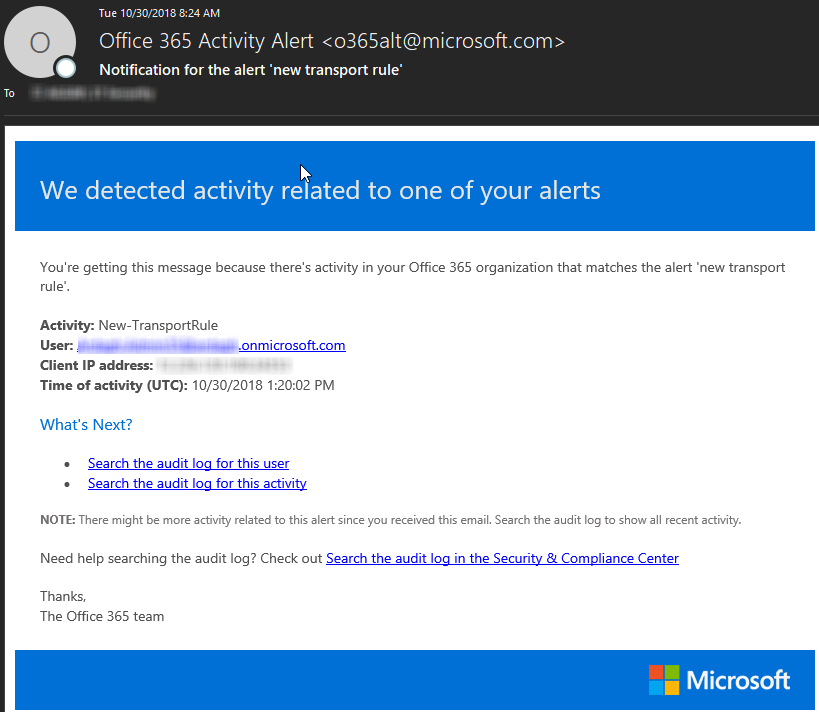
Now that the activity alert is in place, go ahead and create another test transport rule. You will receive an email notification about the new rule you created. The notification email will look similar to the one below.
Alert settings via the portal
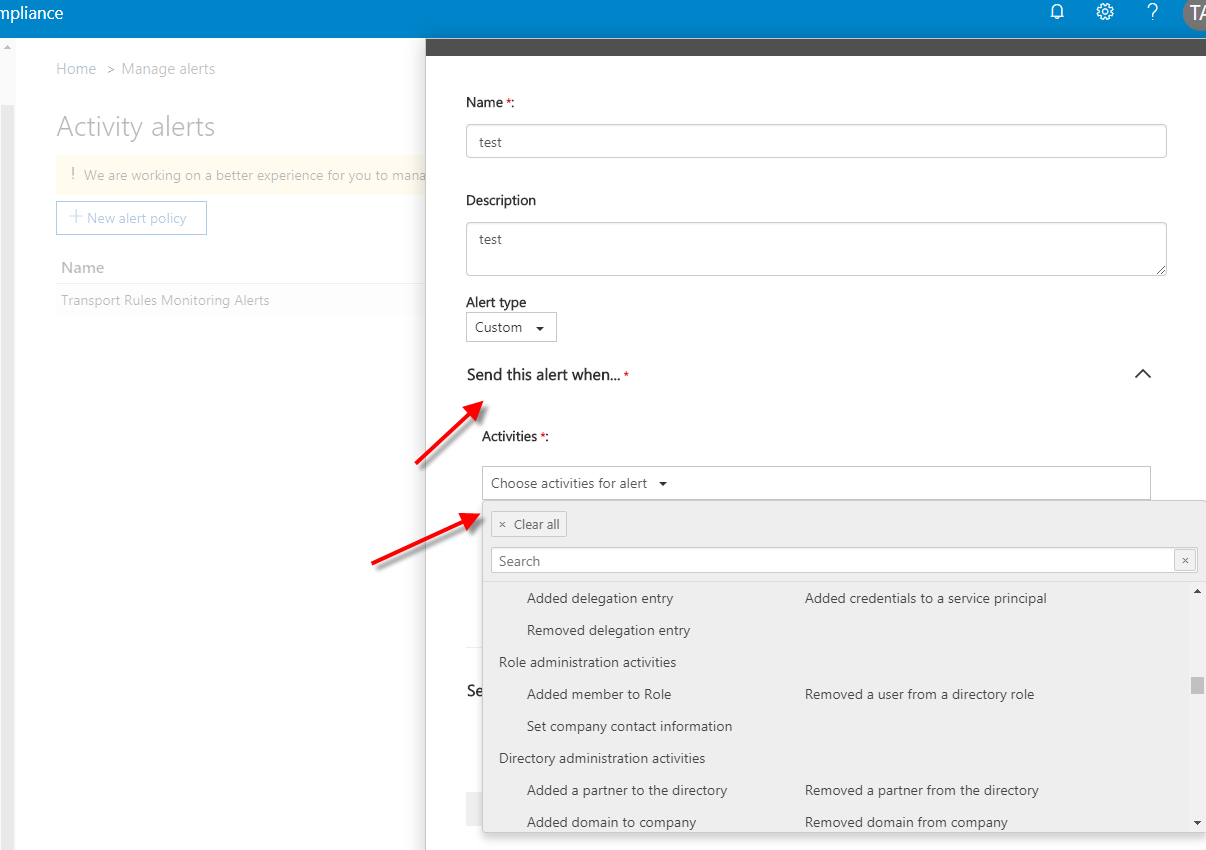
There are hundreds of alerts already available to get you started. First, let’s go back to the Activity Alert page and select New Alert Policy. Then, select the drop-down menu for Send this alert when. Under Activities, you can select the drop-down menu for Choose activities for the alert. Finally, take a look at the many items for which you can create activity alerts. You’ll find a complete and detailed list of all available items here. You can read all the details in the Checked Activities section.
Summary
As you can see, the number of activity alerts for each Office 365 platform is a good start. However, there are many options not listed here. Therefore, you will need to investigate the audit logs to obtain the executed commands. Once in hand, creating activity alerts will keep you informed of changes in your tenant, whether planned or malicious.
Microsoft’s Office 365 Secure Score recommends having no more than five global admins. However, if your tenant must have more than five Global Admin accounts, make sure you know exactly who and what has changed in your tenant. Also, learn about activity alerts and set up your own rule sets to stay on top of changes in your tenant. Also, work with your SharePoint admin and show them the possibilities of activity alerts. Finally, make their job easier by alerting them to things they may not be aware of.
After that, I hope this experience was very informative for you. If you have any questions or would like to discuss this, please comment below. Thank you!