Learn how to trigger a Microsoft Flow in SharePoint to automate repetitive tasks. By connecting Power Automate (formerly Microsoft Flow) to a SharePoint list or library, you can trigger flows in SharePoint automatically when items are created, modified, or deleted. Connecting Flow SharePoint automations saves hours of manual work each week.
How to trigger Microsoft Flow in a SharePoint list
In this article, I’ll show you how you can quickly and easily trigger Microsoft Flow in your SharePoint list. I’ll cover triggered flows:
- manually for a selected item in the list
- automatically for a new or updated item in the list
Manually triggered flow for a selected list item
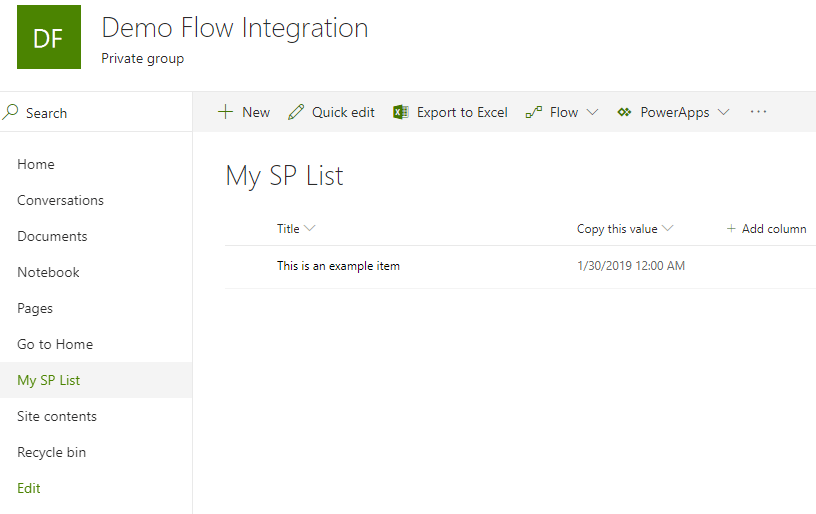
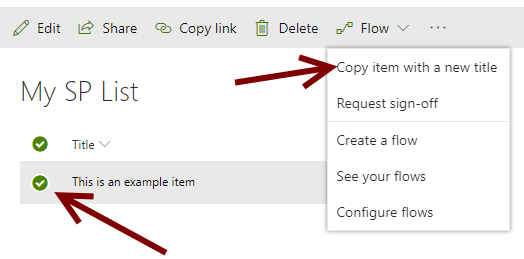
For this case, I’ve created a simple custom list on my SharePoint site. The use case I want to cover is copying a selected item with a new title. My list looks like this:
I’ll walk you through the process, but as you can see from this gif, it takes a few seconds in total to complete the full integration.
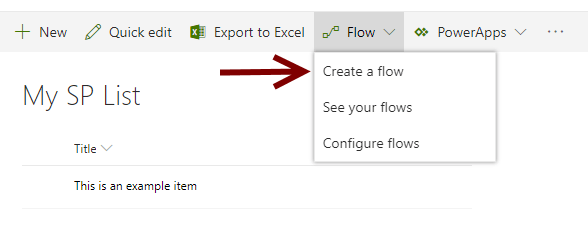
Ensuite, je clique sur Flux > “Créer un flux”.
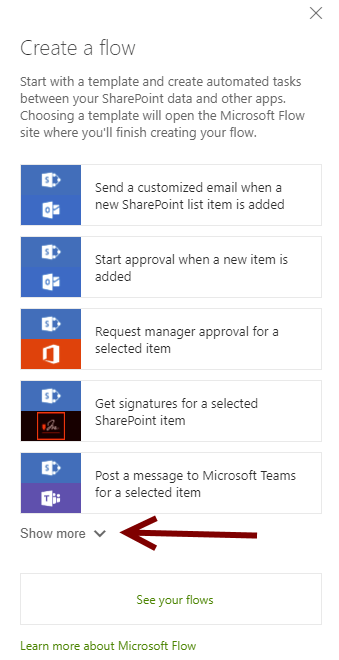
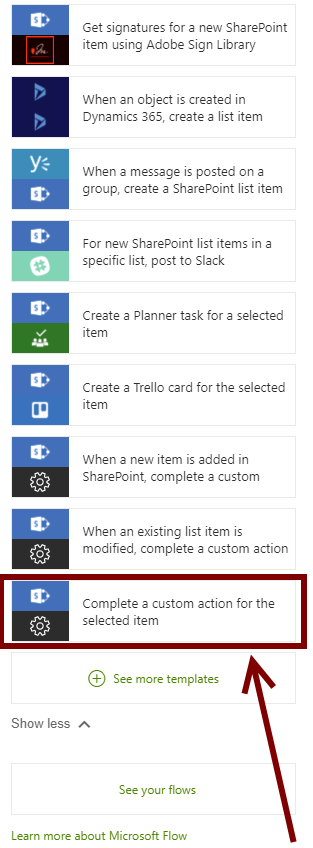
This will bring up a panel on the right-hand side of the screen with several different examples of ready-to-use feeds for your site. I highly recommend playing with them in your spare time. But since we want to build our own custom feed, let’s click on the “Show more” button and, at the very bottom, choose a template entitled “Complete a custom action for the selected item”.
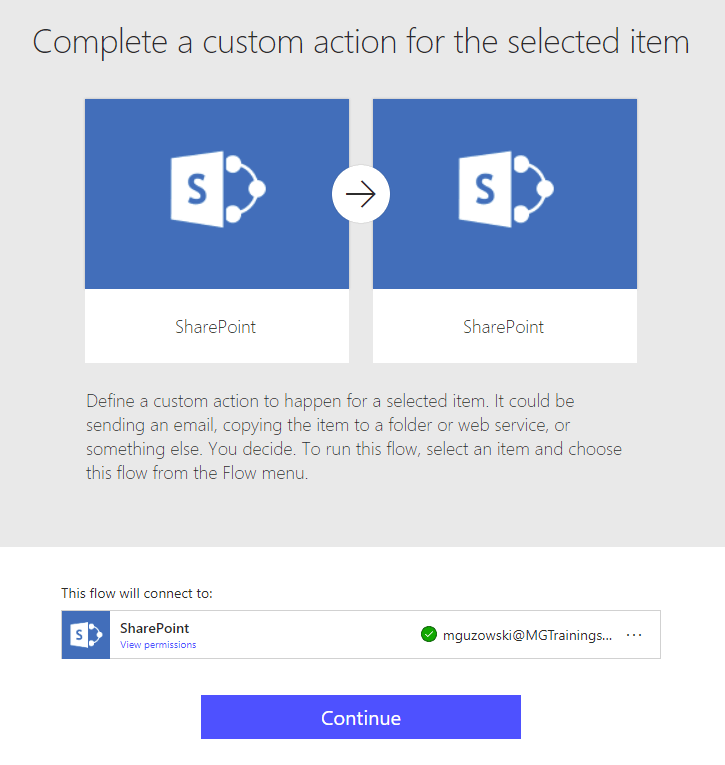
This will open a new tab with a page of information about the model and the connectors it uses. Click on “Continue”.
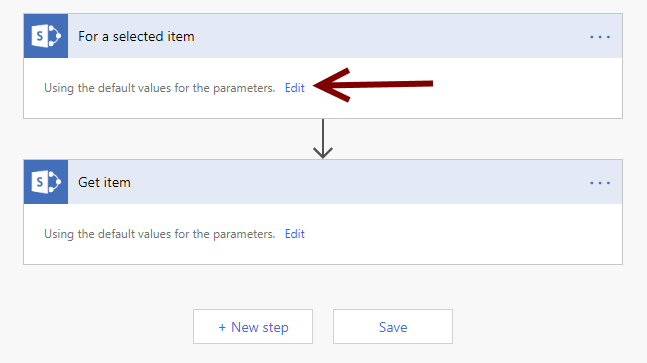
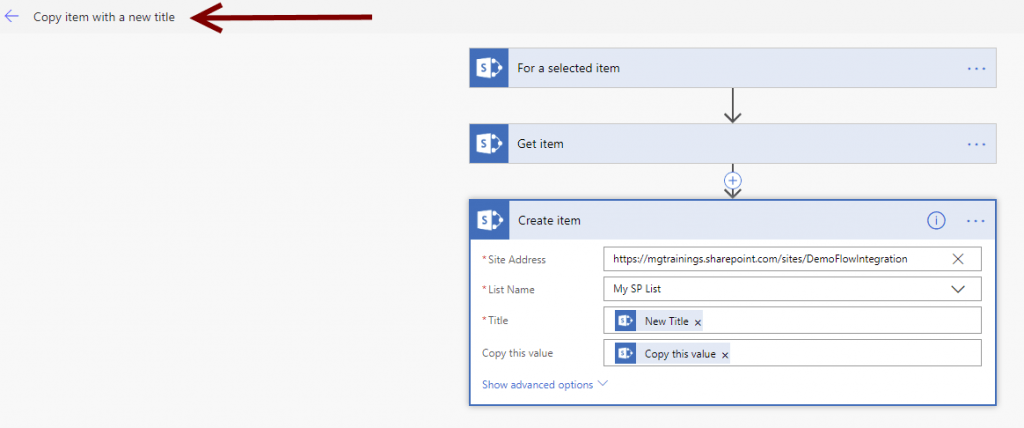
The flow is as simple as our list: a trigger (for a selected item) and an action (Get item). Click on “Edit” to see more details about the action and then “+ Add entry”.
Create a trigger

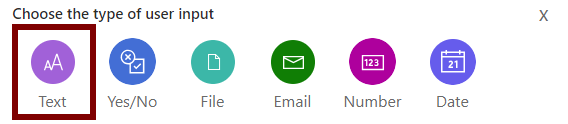
From here, you can add several different types of input (depending, of course, on the behavior and validation of the field). To provision a new element title, we need the “Text” field.
A new line of parameters will appear below the List name drop-down list. Don’t forget to change the name and description of the input field, as these will be displayed to the user.

Create an action
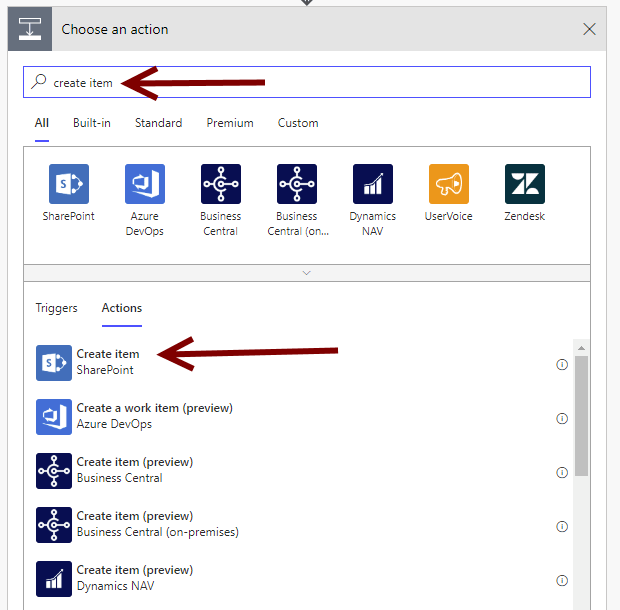
Great! Now let’s add a SharePoint action “Create an item”. To do this, you need to :

In the search box, type “Create item” and select the item with the “SharePoint” icon.
This shows a new action block. Fill in the site address and the list name. If the drop-down lists don’t show the values you’re looking for, click on “Enter custom value” and then (!) supply the name manually.

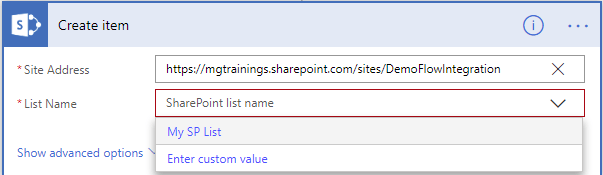
After selecting a list, wait a few seconds for the fields to load – this shouldn’t take too long, as there’s only one field.
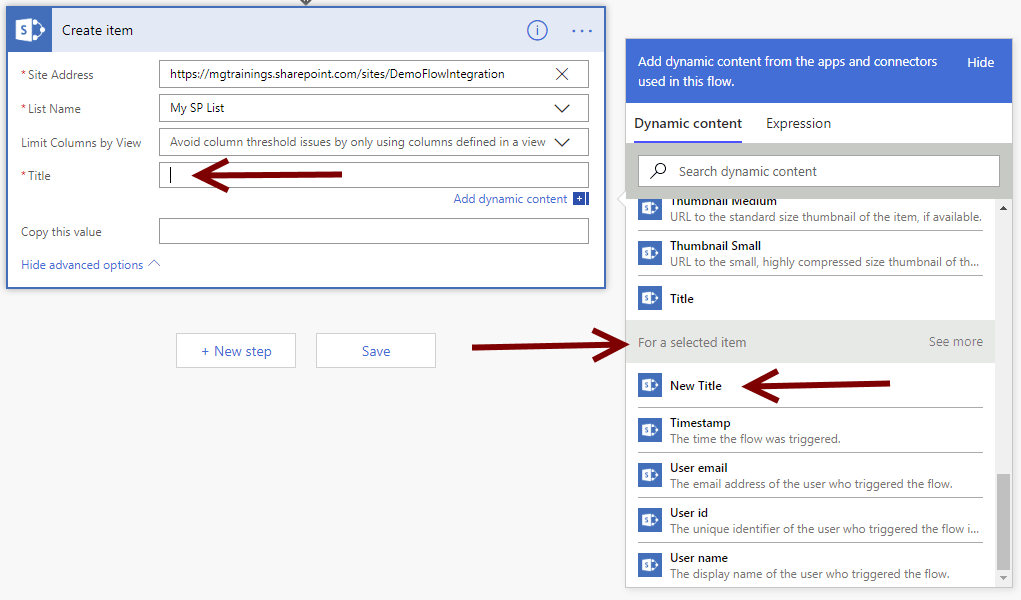
Once your custom list fields have loaded, click on the Title field. On the right-hand side, scroll down to the “For selected item” section (this is the name of the trigger, so if you’ve changed its name, it may be different) and select the name of the field we’ve added (“New title” in my case).
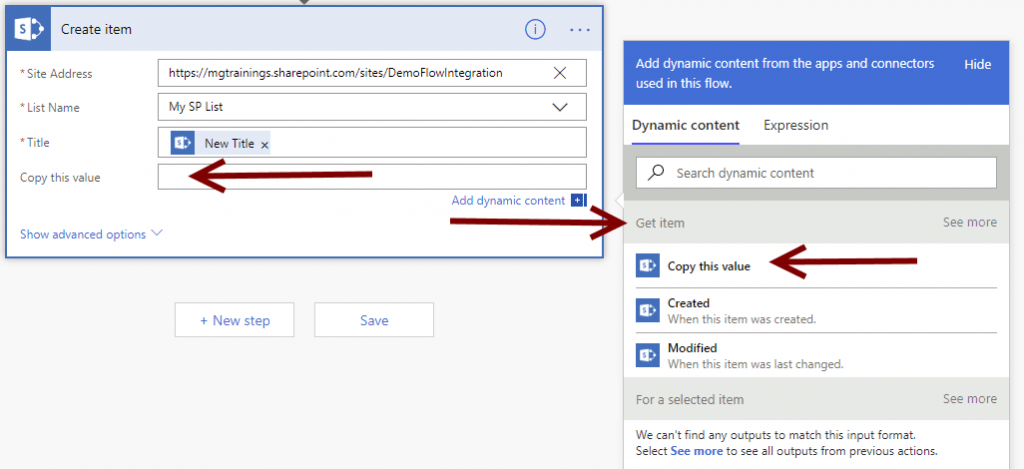
Now select the “Copy this value” field, and in the right-hand panel, in the “Get item” section, select “Copy this value” – this will retrieve the value from the “Get item” action (which contains the original item) and place it in the “Copy this value” field of your new item.
The last thing to do is to give our feed a descriptive name. Click on the name in the top left-hand corner and modify it.
Click Save and return to your list. Now, when you select your item (and only then), a new feed action will appear. TEST IT 🙂 .

Automatic feed triggering for items created or updated in the list
In this case, we’ll send an e-mail notification as soon as someone creates a new item in this list. Of course, this may not be very useful, and such an integration could quickly fill up our mailbox. But it’s easy to imagine real-life examples like this:
- Sends a notification to the mobile if the “accepted” field has been manually set to true.
- As soon as someone uploads a non-English document to the library, it is immediately translated into English.
- Send an email to the supervisor if someone deletes a file from the “Archive” library.
- And so on…
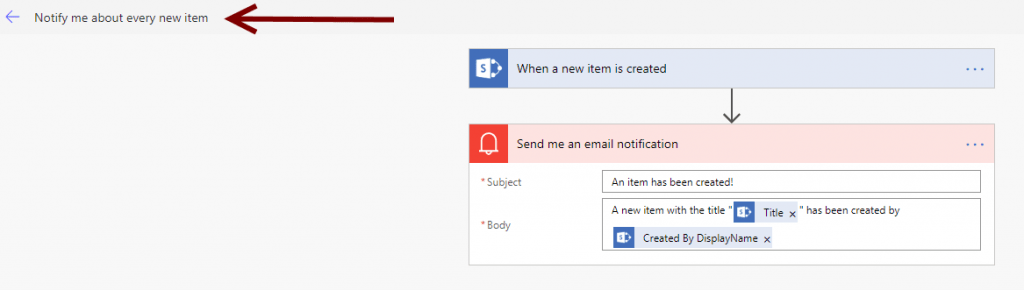
Back to work! First of all, in your list, click on Feed > Create a new feed > “show more” (you know the procedure from the previous section) > select the template “When a new item is added in SharePoint, fill in a custom form”.

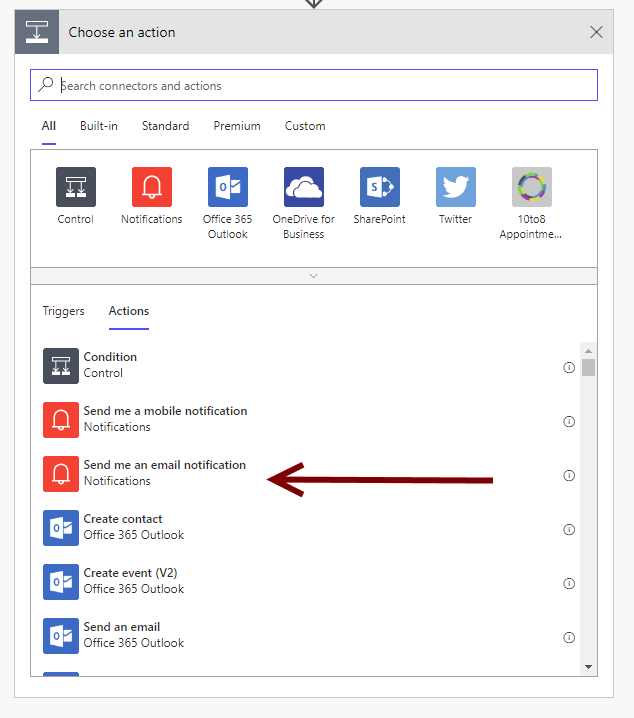
Add an action as in the previous use case, but this time choose “Send me an e-mail notification” from the action drop-down menu.
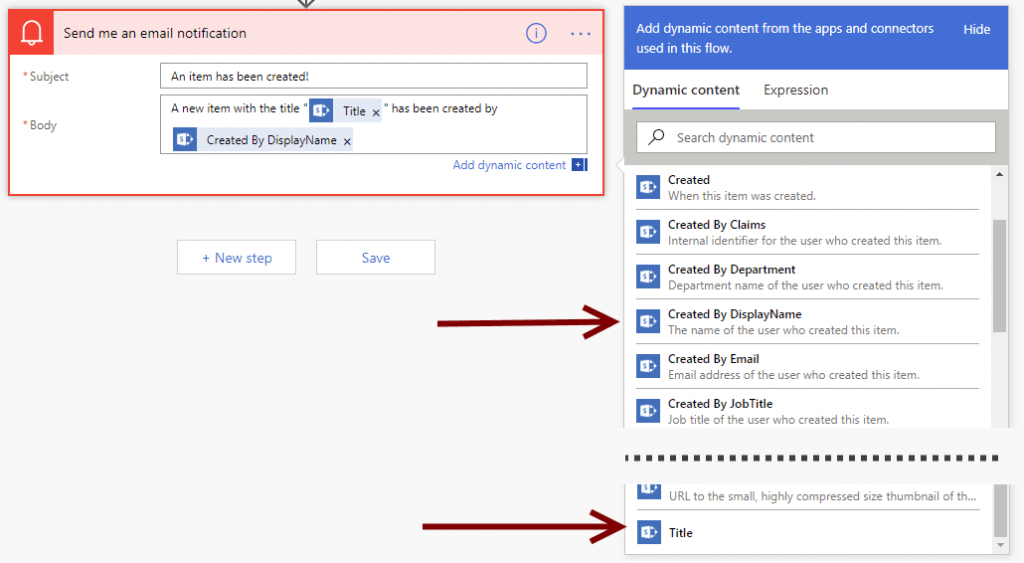
Dans les champs d’action, mettez un objet et un corps de message appropriés. Veuillez noter que dans le champ du corps du message, nous avons mélangé du texte normal (il suffit de l’écrire) avec les champs de l’élément (choisissez-les dans le panneau de droite).
This time, don’t forget to give the feed title a descriptive name.
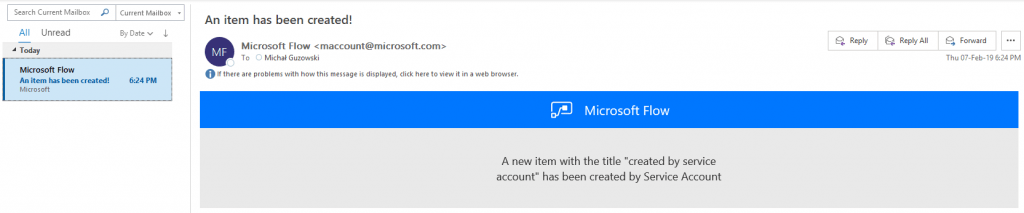
Now you can test it!
Please note that using the notification will only inform the creator of such a feed. As in the screen example: even though the serviceaccount user created an item, only I received the e-mail notification.
Conclusion
Don’t forget that in SharePoint Online (or even SharePoint On-premise if you’re using data gateways), you can greatly extend the functionality of your site or list by integrating it with other out-of-the-box services from your Office 365 tenant. There are many, and each of them can be configured without writing a line of code! Here are just a few:
- Microsoft Flow
- PowerApps
- PowerBI
- Planner
If you’re not afraid of coding, you can also take a look at these sites:
- Columns conditional formatting
- Site Scripts
- SPFx (SharePoint Framework) apps
- PnP Provisioning framework
See also our introduction to SharePoint pages and web parts.
For the full Power Automate connector reference for SharePoint, see the official Microsoft Power Automate SharePoint connector documentation.
📱 Need help building or governing your SharePoint environment?
We design SharePoint intranets, configure permissions, and set up document management for growing organizations. Book a free 30-minute call to discuss your project. 📅 Book a free 30-min call | 💬 Chat on WhatsApp
Microsoft 365 – Introduction to SharePoint Pages and Web Parts