Publish a Power App to a SharePoint page
SharePoint and Power Apps
If you have published a Power App for your users, you will want to let them know that it is available and that they can start using it. For example, it may be an informational app that they can access at their convenience, or a call to action to ensure that everyone submits important information by the deadline. Ultimately, a great way to let them know about your app is to add the published app to a SharePoint page.
This post assumes that your application is already published and that you have a modern SharePoint site to add the application to. If the application has high visibility, you will probably want to add it to a communication site on your intranet. If you are not familiar with your intranet configuration, ask your internal IT team for advice. Or, if this application is intended for a small team or workgroup, it makes sense to add it to a page on a team site.
In all cases, make sure your application is shared with the right audience. Please note that you must provide the same access to the application as to the SharePoint site. If someone with access to the site—but not to the application—visits the site, they will see an error message in the space where the application would be located. Avoid this problem by using security groups to grant access to both the application and the site.
Add a Power App to a SharePoint page
- In SharePoint, open the page where you want to add the Power App.
- In the upper-right corner, click Edit.

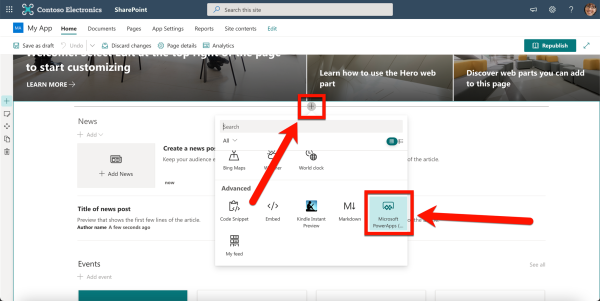
3. Click the plus sign (+) that appears in a section to open the web part menu. Click Microsoft Power Apps in the menu. You can also filter the web part options by typing “power” in the search field.
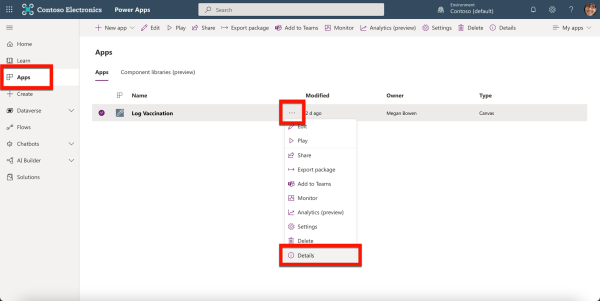
4. In a new tab, open the Power Apps home page and click Apps, then click ⋯ next to the app name and select Details.
5. Under Web Link, highlight and copy the URL (right-click > Copy or Ctrl/Command+C).
6. Return to your SharePoint tab. In the Power Apps pane on the right, paste the URL (right-click > Paste or Ctrl/Command+V) into the Web Application Link or ID field.
7. You can add a thin border around the app by enabling the Show border option.
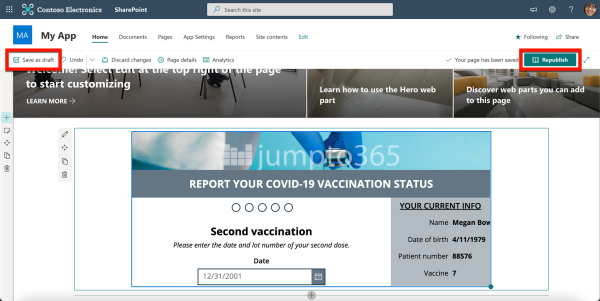
8. Your changes are saved automatically, but to make them visible to others, click either Save as draft (visible only to site owners and members) or Publish/Republish (visible to anyone with access to the site).
Your application is now in place and accessible on this site. However, keep permissions in mind: site permissions may differ from application permissions. Adding an application to a SharePoint page does not change the application’s permissions.

Optimize the experience
You can continue to manage and update your app from the Power Apps portal. That way, whenever someone loads the SharePoint page, the latest published version of the app will be displayed.
You may want to consider including some context or instructions on your page next to or near the app. We particularly like the section layouts called one-third left and one-third right for this situation.
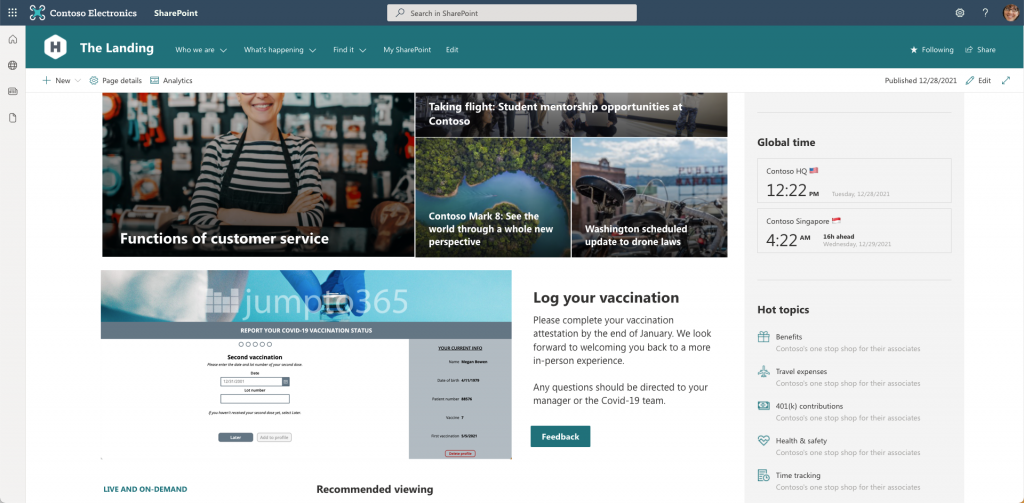
You can use one-third of the section to include instructions, context, and other web elements such as calls to action or buttons, and two-thirds of the section for the application. By placing the application on a highly visible page, such as your intranet home page, you ensure that people see the tool or respond to the submission request, because they won’t miss it!