Use SharePoint Online Libraries for Document Management
In the modern workplace, we use multiple systems to meet business needs. For the human resources information system (HRIS), intranet sites and wikis follow us everywhere we go.
Often, all of these sites contain duplicate information that we need to manage. Therefore, it is always difficult to maintain an up-to-date version of the document on each site.
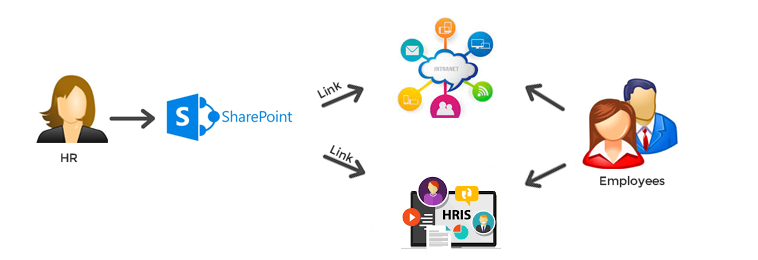
This is a common scenario for many organizations. The human resources department manages and publishes company policies on the company intranet and in the HRIS. It also keeps an original copy of the document on the local machine or shared drive for revisions.
The shared drive or local machine contains two copies of the document:
- a Microsoft Word version for editing
- a PDF version for sharing by downloading on the intranet and HRIS.
Additionally, HR can distribute a non-editable version of the document to intranet and HRIS administrators, so they can download it whenever changes are made to a policy.
This is what it looks like:

As you can see, there are four copies of the same document in multiple locations. HR needs to ensure that both the intranet and the HRIS have the same copy of the uploaded document.
In this article, I’ll present a solution for this complex setup using a SharePoint document library. This eliminates the need for HRMS and intranet administrators to get involved in the policy publishing process.
Okay, let’s get started.
Create a SharePoint document library
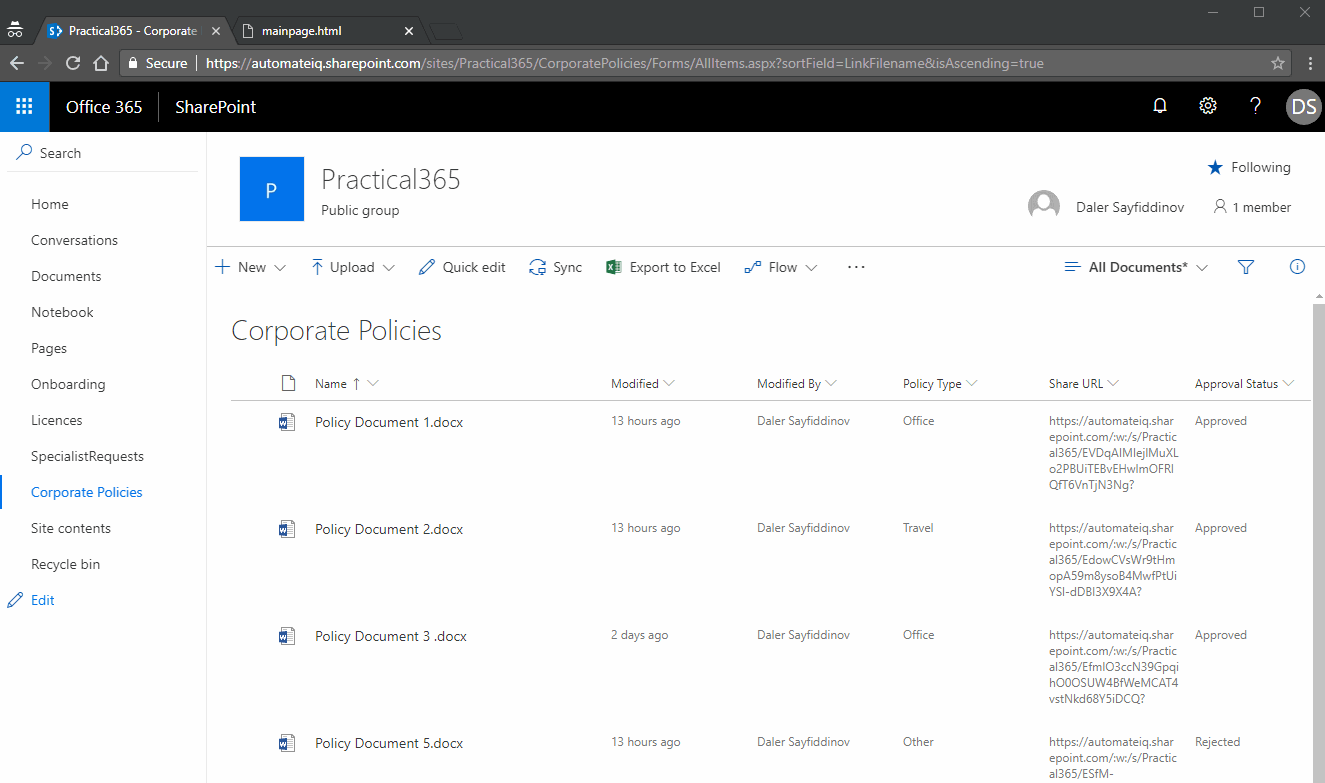
First, you need to create a SharePoint document library with the columns shown below. In fact, you can add more columns based on your business needs. For this demonstration, I’ve named the document library Company Policies.
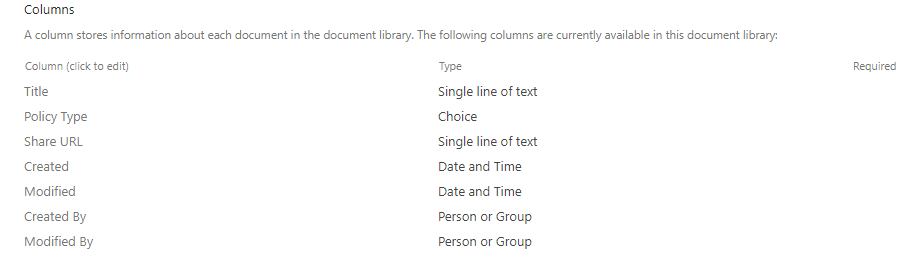
There is a column I specifically created for sharing purposes, called Share URL. This column is simply a plain text column that stores the file’s share URL. You’ll see why you need this column later.
Next, we need to enable content approval for the library by navigating to Library Settings -> Versioning Settings.
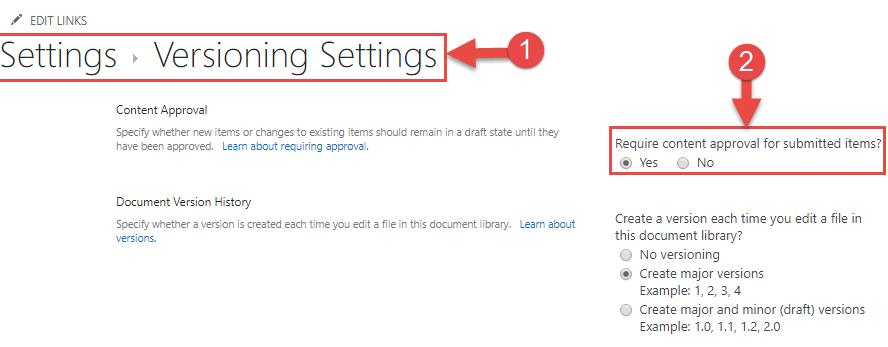
By enabling this feature, every file in the document library must be approved to access changes made to the file. This setting will solve the problem where HR needs to maintain working and approved versions of the file. After enabling this feature, you will notice that the Approval Status column appears in the list view. However, you have no control over the Approval Status field.
Now that the document library is ready to host files, let’s configure permissions.
Configure permissions
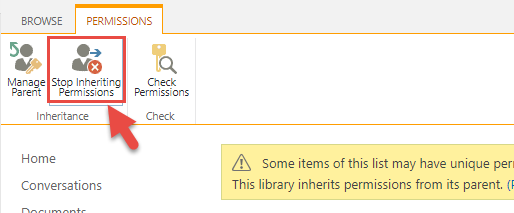
Since the corporate policy document library is so important, we want to make sure the files are protected. To add extra protection, we’ll break the inheritance of site-level permissions. This way, site users won’t have access to edit files in the targeted library. We’ll also need to give policy approvers access to approve files before they’re visible to the entire organization. Please follow this link to learn more about customizing SharePoint site permissions. If you’d like to understand SharePoint permission levels, check out this link.
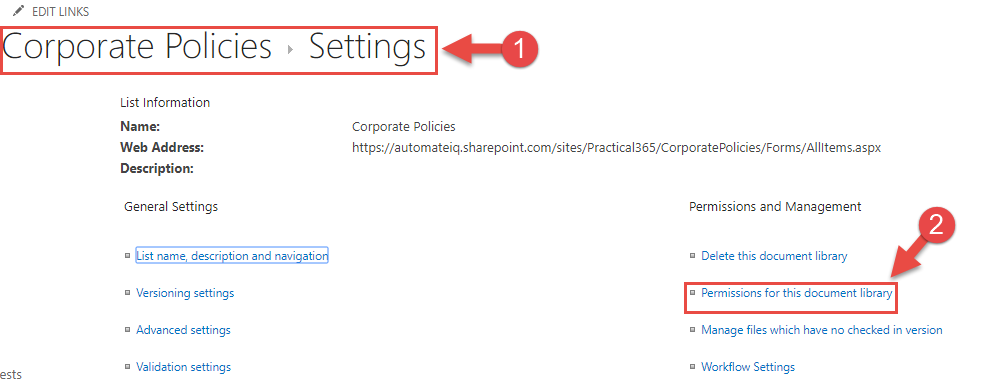
Let’s make these changes. Navigate to the SharePoint Library Settings page and click Permissions for this document library.
Then click Stop Inheriting Permissions.
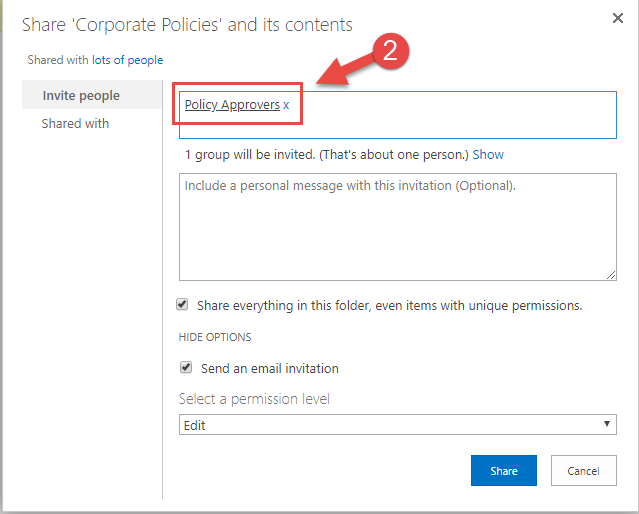
Approval SharePoint group
We can now assign a specific SharePoint group the role of approver for this document library. First, create a SharePoint group, then add the users who will be approvers for this library.
On the Library Settings Permissions page, click Grant Permissions. Search for your approver group name, select an editing permission level, and then click Share.

Make sure other users have read-only permission for the library.
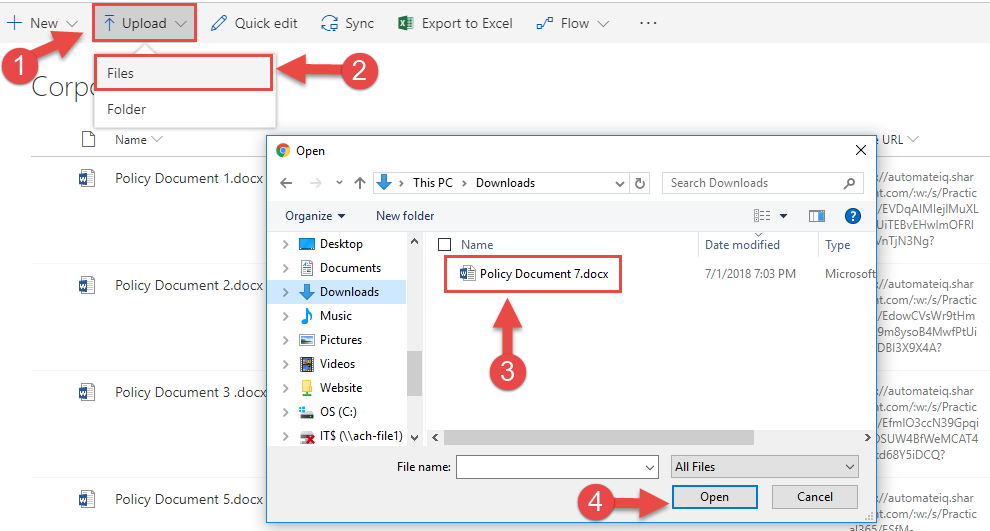
The library is now ready for file upload. If you plan to test user permissions, I recommend using two different computers. Sometimes, Microsoft Office loses track of which account you’re logged in with.
Click Upload, select File and navigate to the local machine to choose your document to upload.
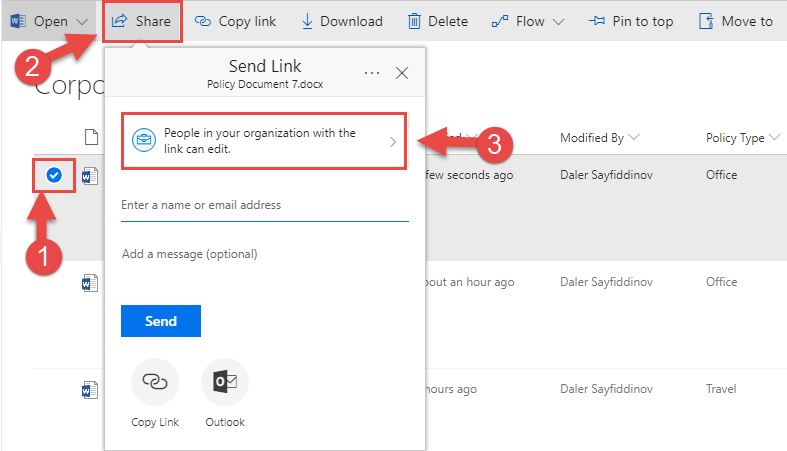
Share a file
Once the file is uploaded, we’ll need to complete the file’s metadata. But before we do that, we’ll get the file’s shareable URL. Select the file, click the Share button, and choose “People in your organization with the link can edit.”
In the next step, deselect Allow editing and click Apply.
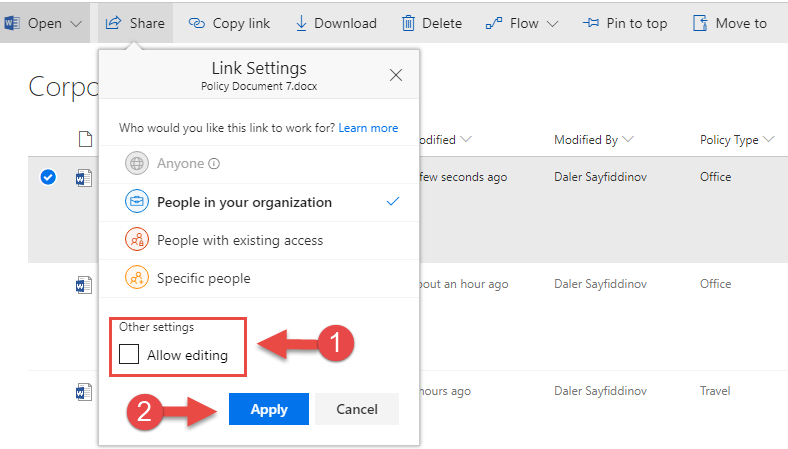
In the previous two steps, we customized the shareable URL that will allow read-only access to your file. If you don’t see any sharing options, ask your administrator to check the tenant-level settings.
Copy URL
Now we need to copy the URL and save it in the file metadata for easy access.
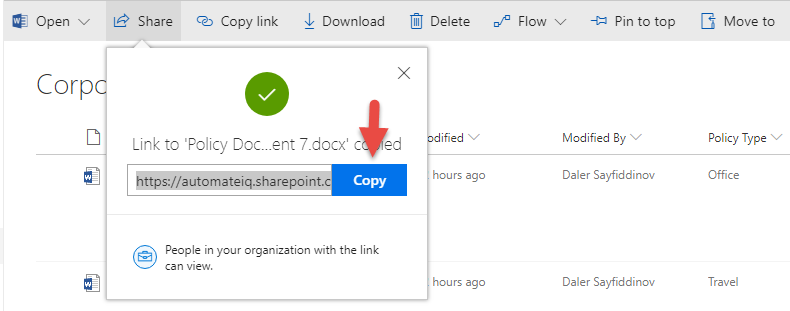
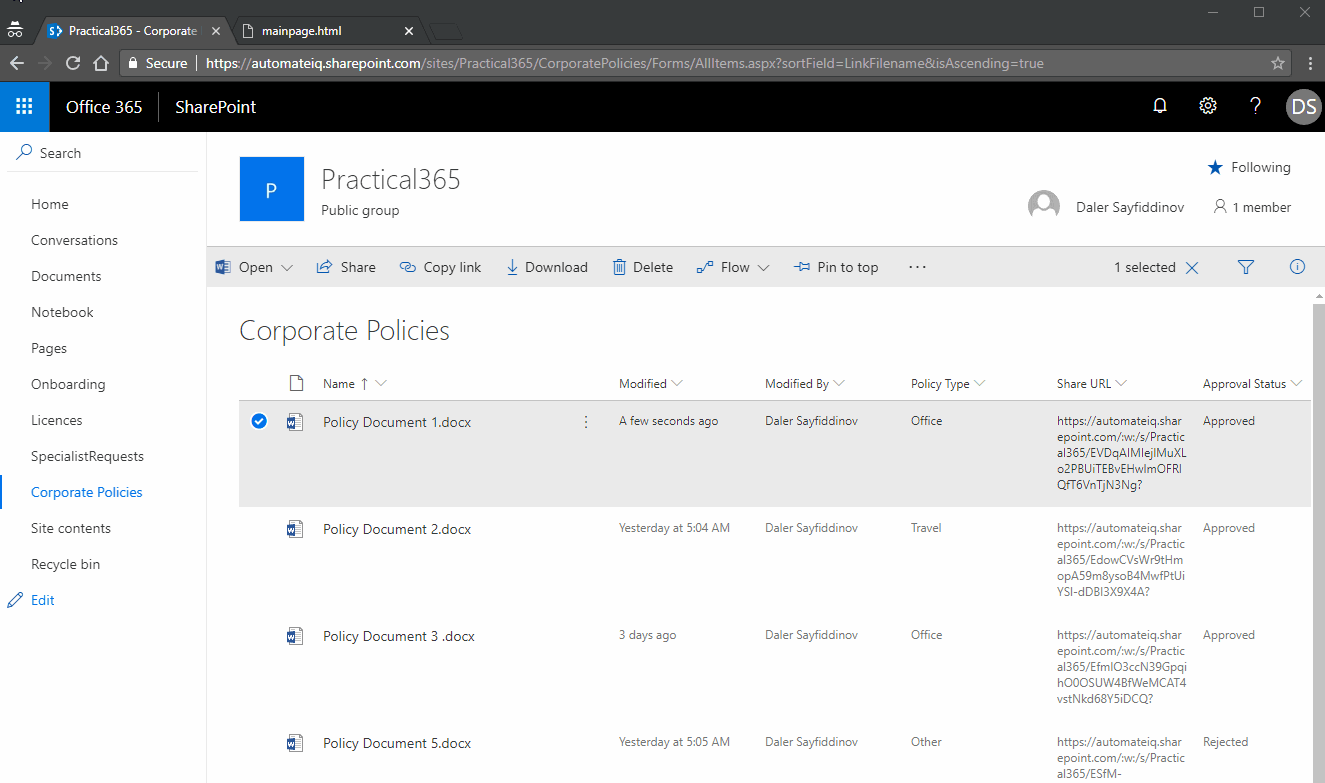
This URL remains unchanged throughout the file’s lifecycle. Since we’ve copied the URL to the clipboard, let’s edit the metadata of the file we just uploaded. Select the file, and on the right side of the screen, edit the metadata.
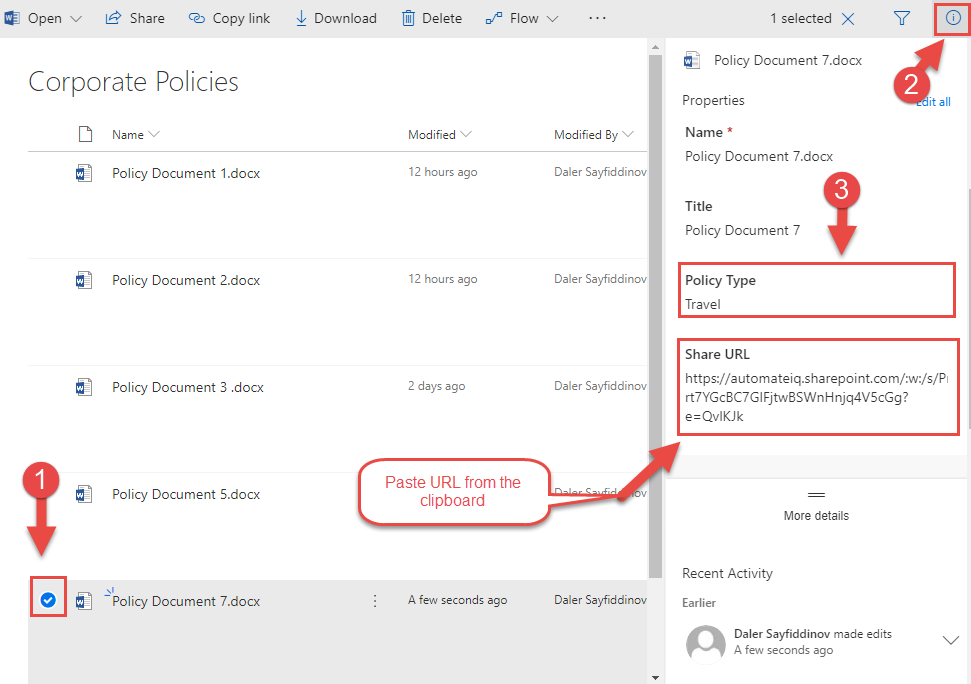
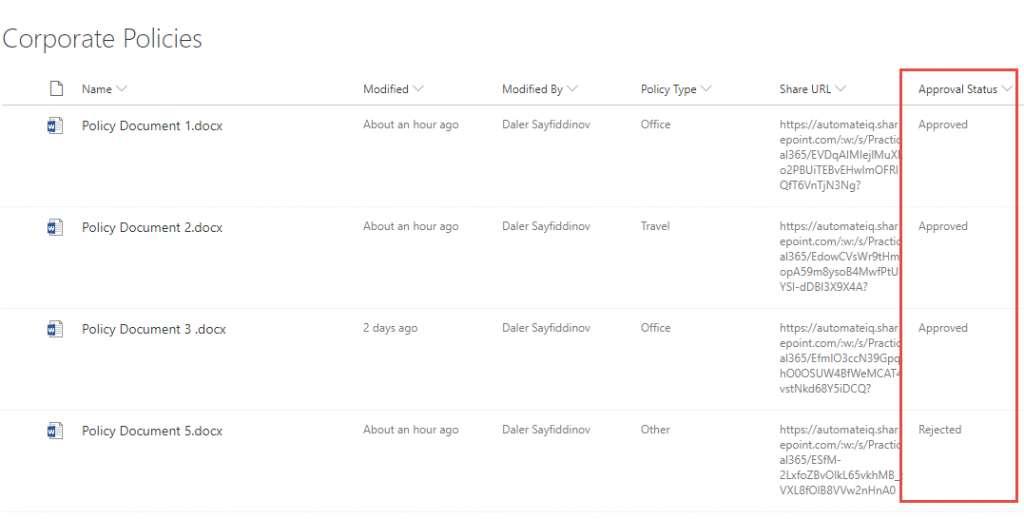
You will notice that the Approval Status column indicates that the file is pending approval. This means that the file is not available to other users. However, if after approval, you then make changes with the approval status “Pending,” users will have access to the file with the latest approved version. For more details, visit this link and learn about SharePoint content approval.

Approve the file
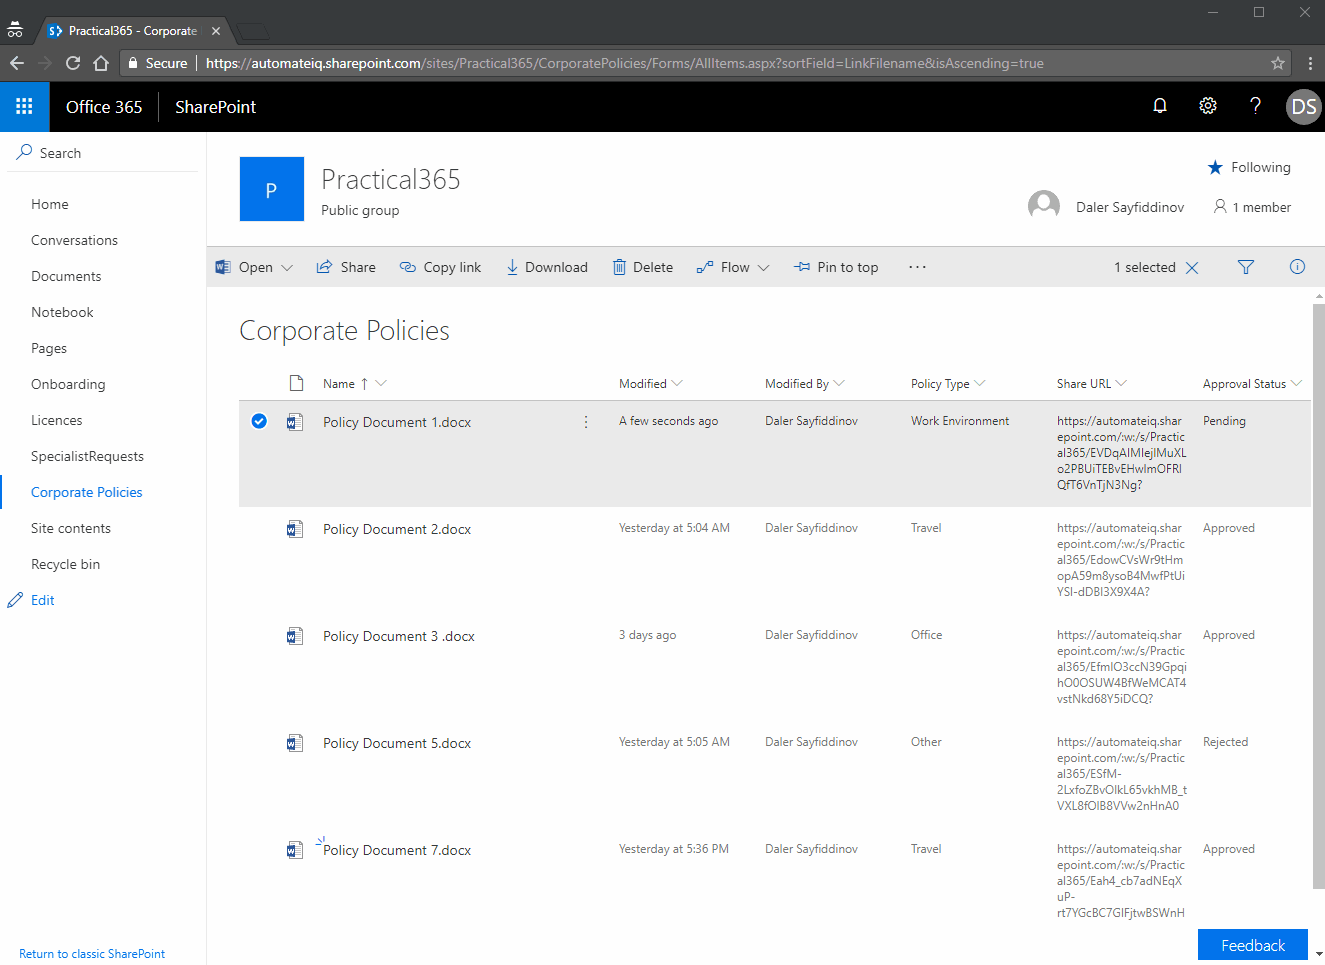
Let’s approve this file by clicking the ellipses (three dots), More, and then Approve/Reject. This makes the file available via a shareable URL or direct access to the library.

Great, we’ve prepared the workspace for our HR team. You’ll need to explain to your HR team that they can safely work on the files in this library. And only approved versions will be visible to employees. You’ll also need to explain that the file becomes unapproved (pending) as soon as it’s edited and saved. This will solve the problem where HR had to keep two copies of the document.
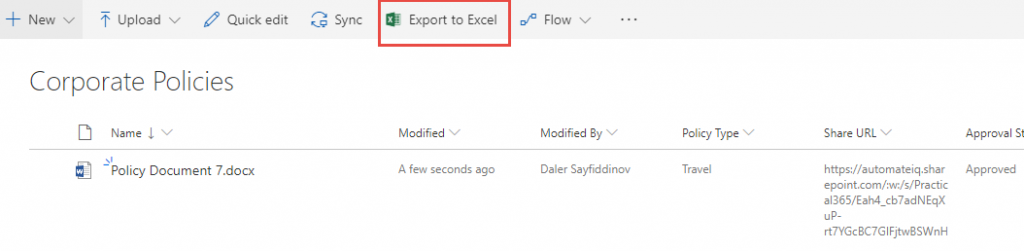
Next, we’ll need to provide shareable URLs of the file to the intranet and HRIS site administrators. So they can view these policies. Intranet and HRIS administrators need to design their HTML pages only once. And when HR makes changes to the file and approves it, the changes are reflected immediately. You can provide the file metadata to intranet administrators by exporting the SharePoint library to Excel.
Click the Export to Excel button, which downloads a query file.
Once the query file is opened, the metadata will be exported to Excel. You can save this file and send it to your intranet and HRIS administrators. You only need to do this once, as long as you don’t add new policies that need to be shared.
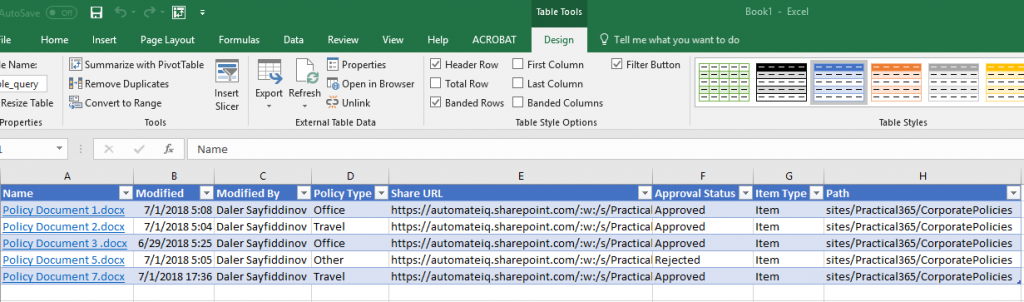
As you can see, the Share URL column has been exported to Excel. Intranet and HRIS administrators can use it to design their respective web pages.
Demonstration
For a quick demonstration, I’ve built a very simple HTML page. The goal is to show how you can share policies outside of SharePoint using the shareable URL. You can also create an email template to share files with your employees. Almost every content management system today allows you to design HTML pages very easily. It can even be your WordPress site to share with a wider audience.

Let’s demonstrate how our new system works.
Let’s first show that when I access the file from SharePoint or an external web page, I am accessing the same file.
Next, I’ll show you how a file goes into “unapproved” (Pending) if I make a change.
Since the latest changes haven’t been approved yet, all employees will only see the approved version of the document. Let’s first demonstrate this by logging in with two different accounts:
- an HR approver
- a normal user (John Doe).

And finally, I will approve the document which automatically updates the link that is exposed to all employees.
It’s easy to set up a system to eliminate unnecessary and tedious tasks for your employees. You can also improve this process using Microsoft Flow by sending alerts and notifications. We’ll save that for a later blog post.