Part Two – How to Create a SharePoint Online Intranet

In Part 1, we demonstrated how to create a communication site to serve as an intranet landing page. We walked you through the process of creating a SharePoint Online site. Then, we added a company logo and changed the site name.
With all this done, the site is starting to feel a little more personalized to our brand. However, the top bar and accent colors on our page are still a bit generic. It would be nice if we could change them to our company’s brand colors. To do this, we can use the Theme Builder, with a little help from SharePoint Online’s Management Shell.
Create a custom color theme using Microsoft Theme Generator
SharePoint Online has several built-in themes to customize the look and feel of your pages. However, there are a limited number of themes that consist primarily of primary colors. And the likelihood of one of them accurately matching your organization’s branding is extremely low. This is where the Microsoft Theme Generator can help. It’s a tool that allows you to create a custom theme and upload it to SharePoint Online.
The Microsoft Theme Generator tool can be found at https://developer.microsoft.com/en-us/fluentui#/. First, you’ll need to know the hex codes for primary and accent colors. There are several hex-coded color picker tools available online. This will allow you to quickly obtain your codes if you don’t already know them.
In the example below, I’m only going to upload one primary theme color. In this case, it’s #f26f56, which is Practical 365’s orange.
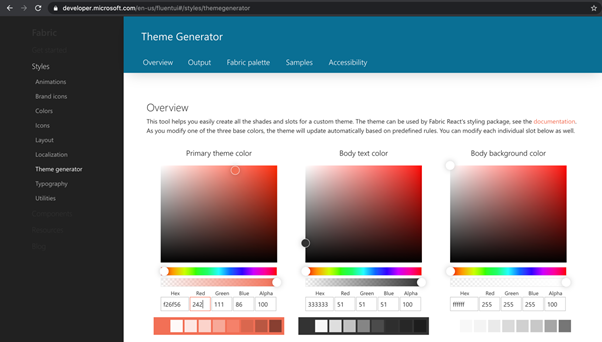
Once I enter my hex codes, it updates the output to JSON, SASS, and PowerShell.
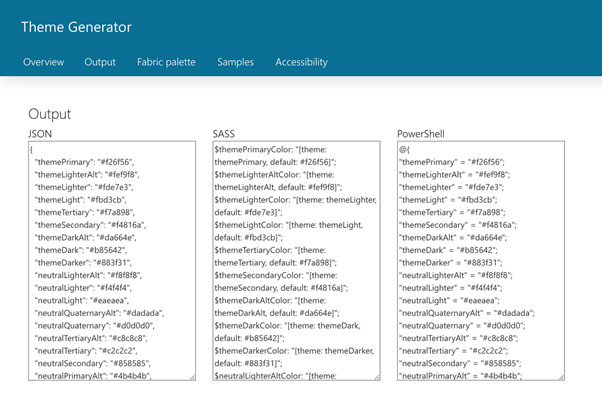
In this case, I’ll use PowerShell and copy the contents of the PowerShell box. Then I’ll paste it into a TXT file to use in the next steps.
Note: If you would like to explore the other methods shown in the image output selections above, please refer to Microsoft’s documentation.
SharePoint Online Management Shell
To upload our new theme using the SharePoint Online management shell, we need to perform the following steps.
- If you don’t yet have access to SharePoint Online Management Shell , you can download it directly from Microsoft here.
- Once downloaded and installed, you can connect to the SharePoint Online service by running the following command.
Connect-SPOService -Url <a href="https://yourtenantname-admin.sharepoint.com" target="_blank" rel="noreferrer noopener">https://yourtenantname-admin.sharepoint.com</a> -credential <a href="mailto:username@domain.com">username@domain.com</a>This command will run in the SharePoint Online Management Shell as shown below.

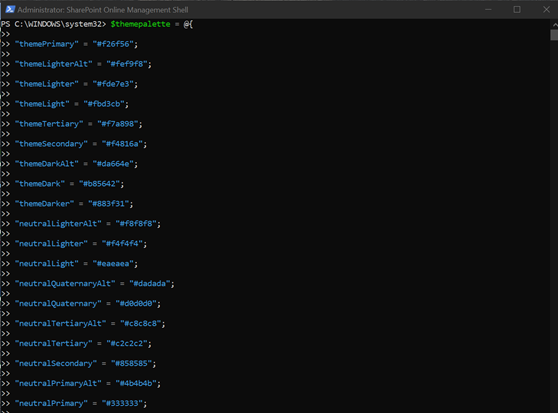
- Now that we’re connected to the service, we need to enter the PowerShell code copied from the theme generator. We simply need to add a variable to the beginning of the $themepalette = code as shown at the beginning of the full code example below.
$themepalette = @{
"themePrimary" = "#f26f56";
"themeLighterAlt" = "#fef9f8";
"themeLighter" = "#fde7e3";
"themeLight" = "#fbd3cb";
"themeTertiary" = "#f7a898";
"themeSecondary" = "#f4816a";
"themeDarkAlt" = "#da664e";
"themeDark" = "#b85642";
"themeDarker" = "#883f31";
"neutralLighterAlt" = "#f8f8f8";
"neutralLighter" = "#f4f4f4";
"neutralLight" = "#eaeaea";
"neutralQuaternaryAlt" = "#dadada";
"neutralQuaternary" = "#d0d0d0";
"neutralTertiaryAlt" = "#c8c8c8";
"neutralTertiary" = "#c2c2c2";
"neutralSecondary" = "#858585";
"neutralPrimaryAlt" = "#4b4b4b";
"neutralPrimary" = "#333333";
"neutralDark" = "#272727";
"black" = "#1d1d1d";
"white" = "#ffffff";
"primaryBackground" = "#ffffff";
"primaryText" = "#333333";
"bodyBackground" = "#ffffff";
"bodyText" = "#333333";
"disabledBackground" = "#f4f4f4";
"disabledText" = "#c8c8c8";
}
The code is executed as follows:
- Once entered, we need to run the command to upload our theme to SharePoint Online. This is done by running the following command.
Add-SPOTheme -Identity “Practical 365” -Palette $themepalette IsInverted $falseSuccessful execution of this command is indicated as follows.

Apply a custom color theme to your site
Once our theme is uploaded to SharePoint Online, we activate it by returning to the site’s landing page. To do this, click the gear icon in the top right corner of the screen. Then select Change appearance, and finally Theme. We can see that we have a new custom theme available in our themes list.
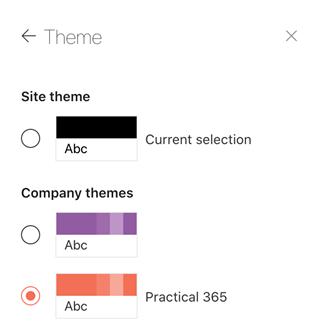
Once we select this theme, it will apply the look and feel to our new page. This is shown in the following image:
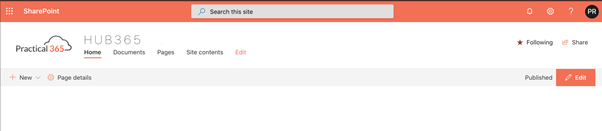
Now we have our communication website page ready with logo, title and theme.
The next step in creating our intranet is to populate our landing page with relevant content. It’s important to carefully consider what you’ll include on the landing page. This page will be the starting point for our users. And if we want it to be successfully adopted, it must have the right content.
Let’s see how we can add the required content to our new landing page.
Create your homepage
To build our landing page, we need to populate it with web components that contain useful information. It’s possible to add many web components and choose from several column layout settings.
In addition to the web components you will add later, you can also select other web components.
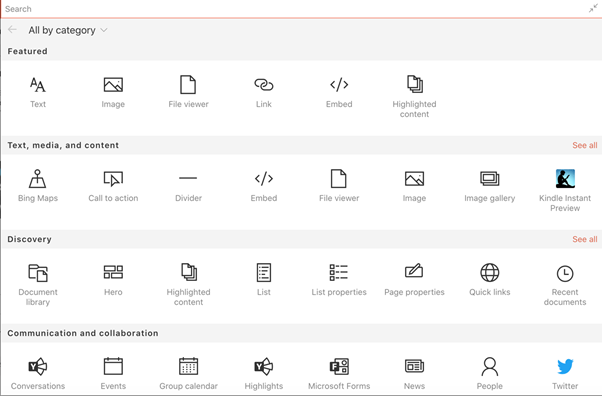
The Image Web Component is useful if you want to add a banner to your landing page. And the Twitter feed is also something my clients like to add. Group calendars and events are also useful web components.
Whenever I create a new intranet homepage, I always tend to include the same layout. I’ll base the following examples on these choices, but you’re of course free to configure your own web parts.
I normally recommend adding the following web parts when creating an intranet landing page.
- Hero – Prominently display up to 5 content items in a highly visual layout.
- Quick Links – Add links to important documents and pages
- News – Show recent news
- Weather – Display current weather conditions on your page
- Image – Display an image on your page (like a banner)
Adding Web Components
In order to change our homepage, we need to perform the following steps.
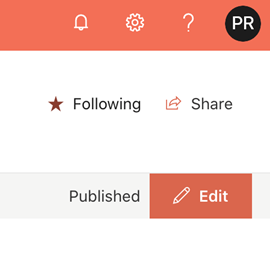
- Navigate to our new homepage. Click the Edit button in the information bar, as shown in the following image.
Note: The information bar is only visible to site owners and administrators.
- The page enters edit mode as shown below:
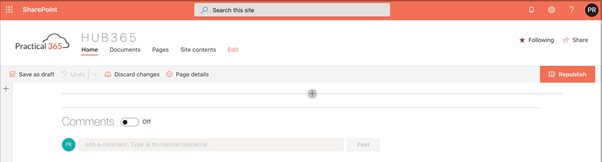
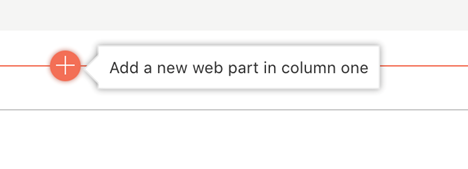
- Click the + to add a new web component.
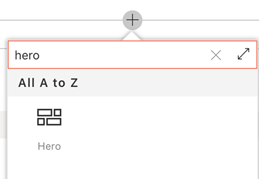
Add a Hero web component
The first web component I like to add as a focal point of the homepage is the Hero Web Component. This is a visual web component designed to grab the attention of users on your homepage.
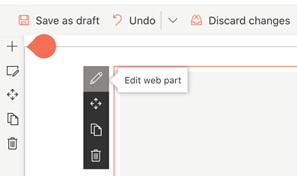
- When you click to add the Hero web component, it initially displays as shown below.
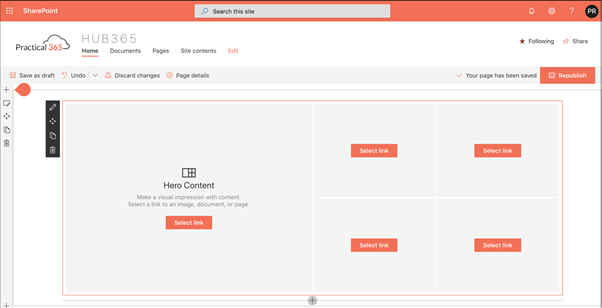
- Click the pencil symbol to edit your web hero part.
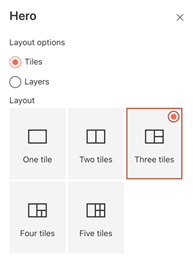
- You’ll see the following layout options. I prefer to have three tiles, but you can choose whichever one suits you best.
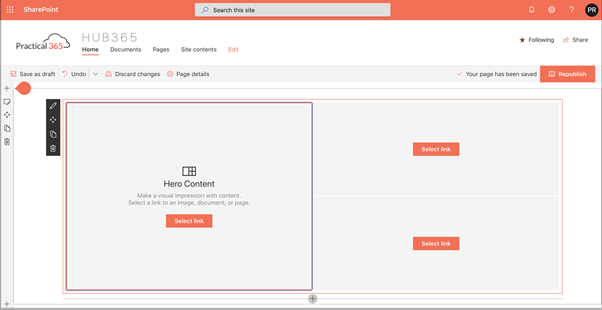
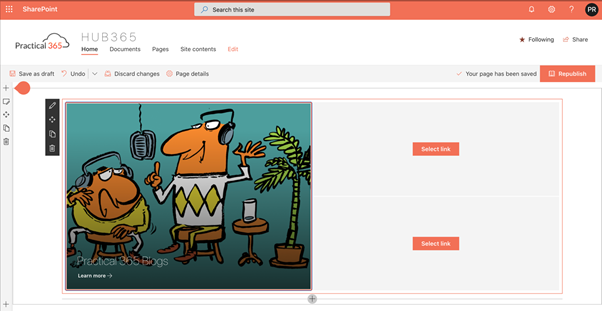
- The Hero Web component now appears as three tiles, as shown below. Click the Select link in one of the tiles to populate the web component with the content you want to promote on your landing page.
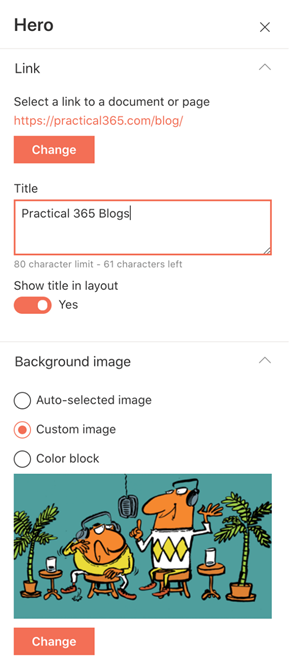
- In the following example, I’ve populated the first Hero web component with a web link, provided a title, and uploaded a custom image.
- Once these settings are added and saved, the first tile of the Hero web part is populated as shown below.
- I went ahead and added content to the other tiles, then clicked Republish to make my additions available to all users.
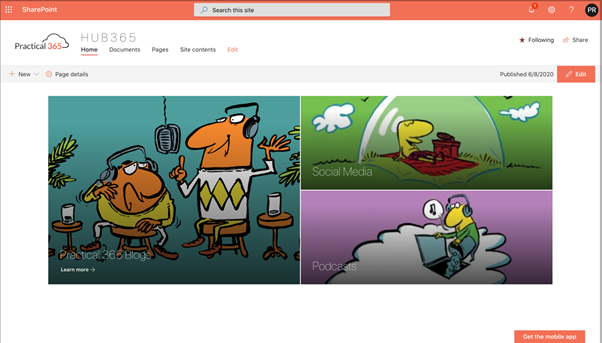
As you can see, the Hero web component is a very powerful visual method for communicating instant information to your audience.
Conclusion
In this article, I showed you the steps to populate your new SharePoint Online communication site with content. We saw how the Hero web part is a highly visual way to promote content.
In Part 3 , we’ll show you how to add more sections and web elements in various formations on the page. This will produce a modern and professional intranet landing page experience.